Site
Each customer can have multiple sites. Once the customer is created the next step is site creation.
Add Site
The site page contains details of the customer like name and address and also an image associated with the customer, the clear storage button is also provided beside add site button for deleting the minio objects manually by the users.
To know more about clear storage and other types of storage purge options click on the below link.
Storage Purge
The user can click on add site in deployment page or also select site card on the dashboard page to create site.
Click on add site in the site list page. This opens up a site create page as shown below.
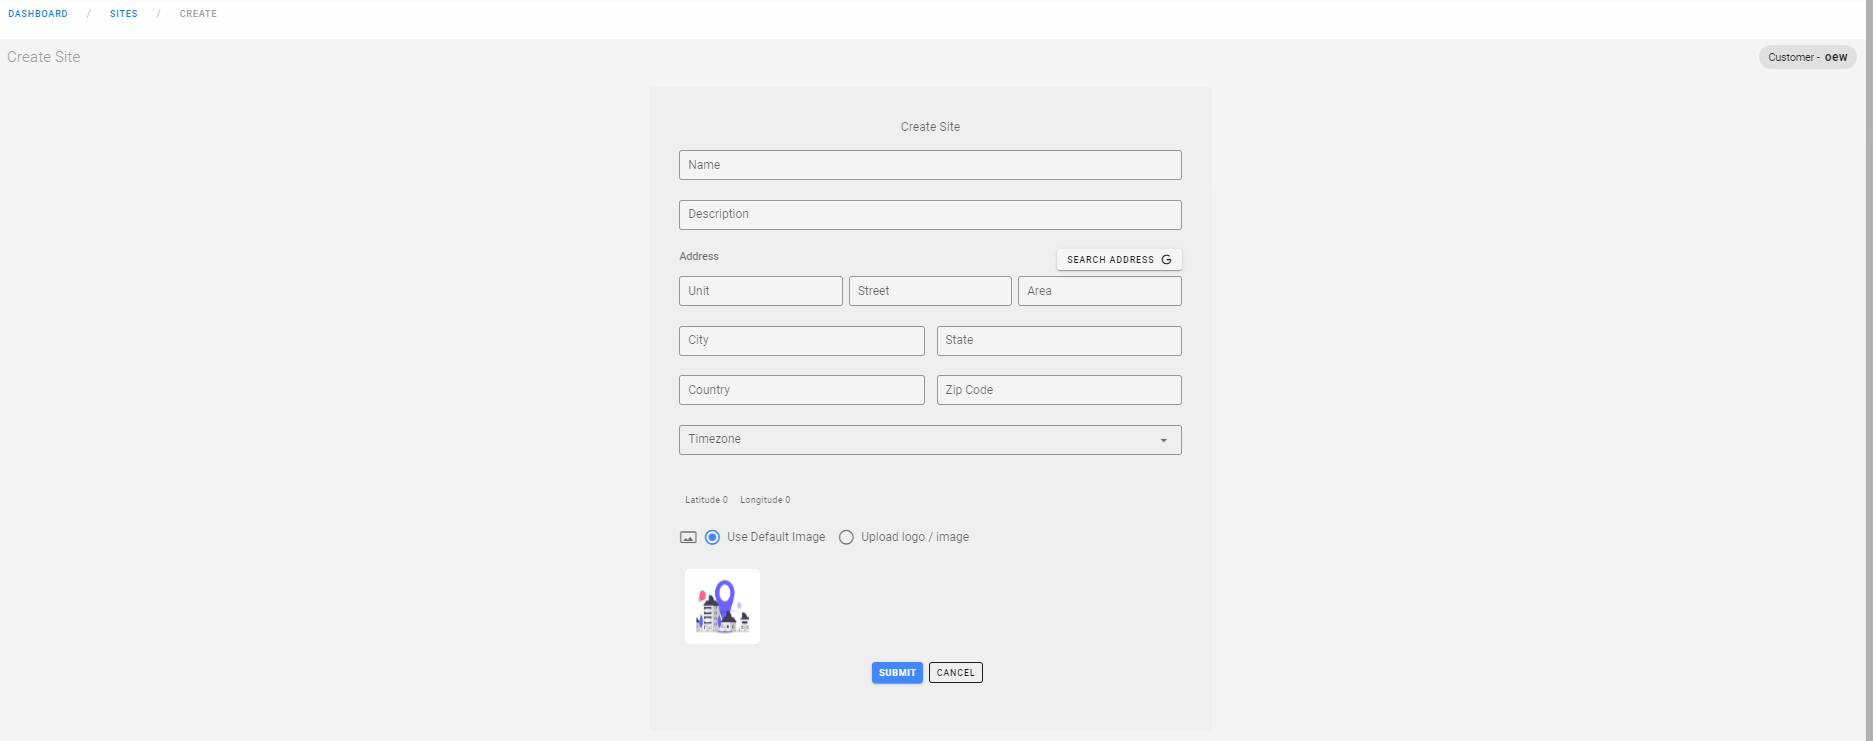
Here fill in the site name, description and the address of the site and based on the country selected, the user can select the timezone from the dropdown list and upload the site image or logo(this is mandatory for site creation) and click on submit to create a site.
Here for the site logo/image, user can select the default image already present or upload any image of user's choice.
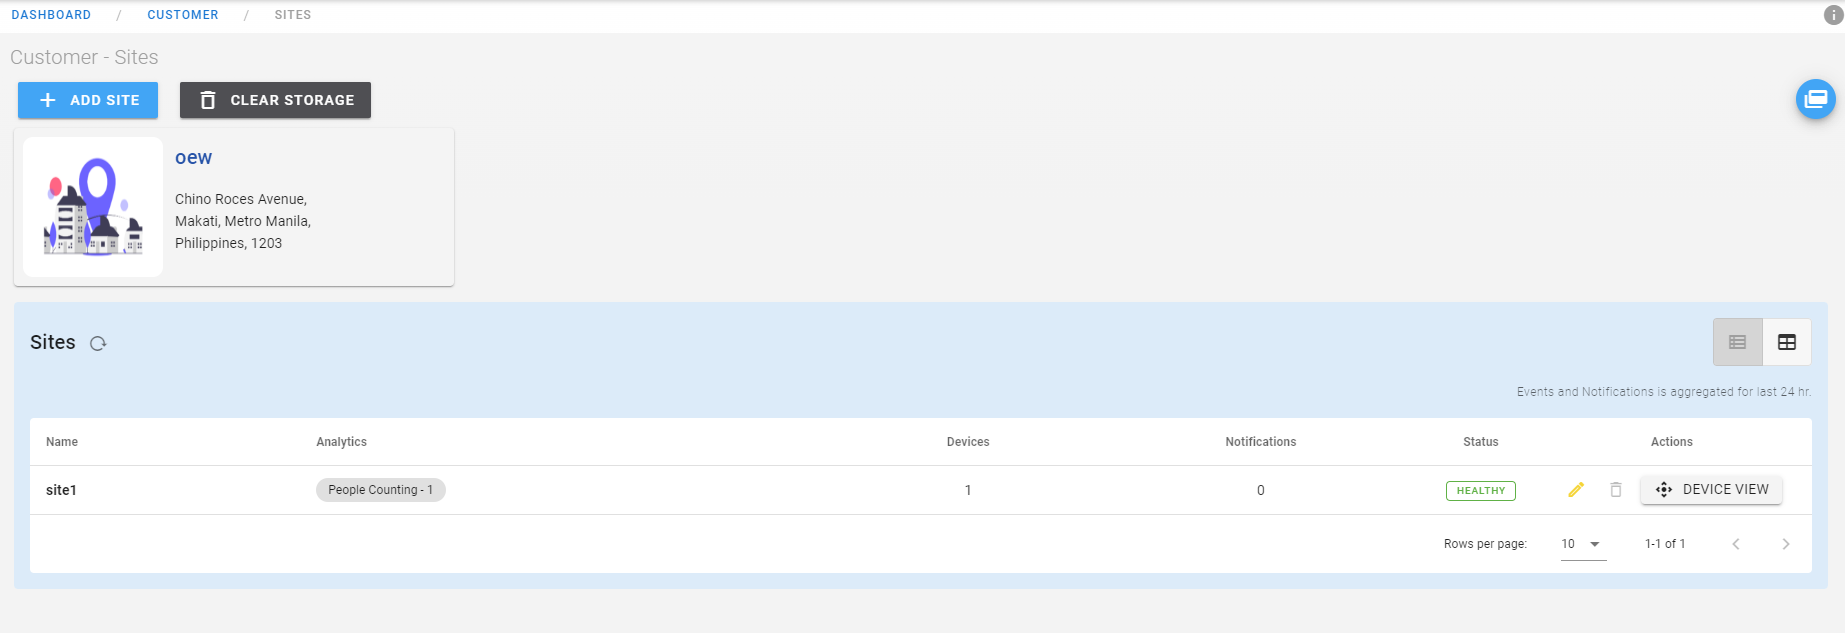
Once the site is created user is redirected to a site page which shows a list of sites created by the user as shown in the first image.
Here the user is provided with list of all sites in tabular form by default which displays site name, Analytics(usecase configured), devices, notifications, status, actions(camera view). To go to the site/id page user can just click on site details in the site table, which takes user to site/id page.
Here the status is shown either Healthy or Critical according to the status of pipeline and channel video.
The user can switch to the other view for displaying sites i.e. the card view on the right of the site table. Here all created sites are displayed in the form of cards with site name and address with its logo provided by the user.
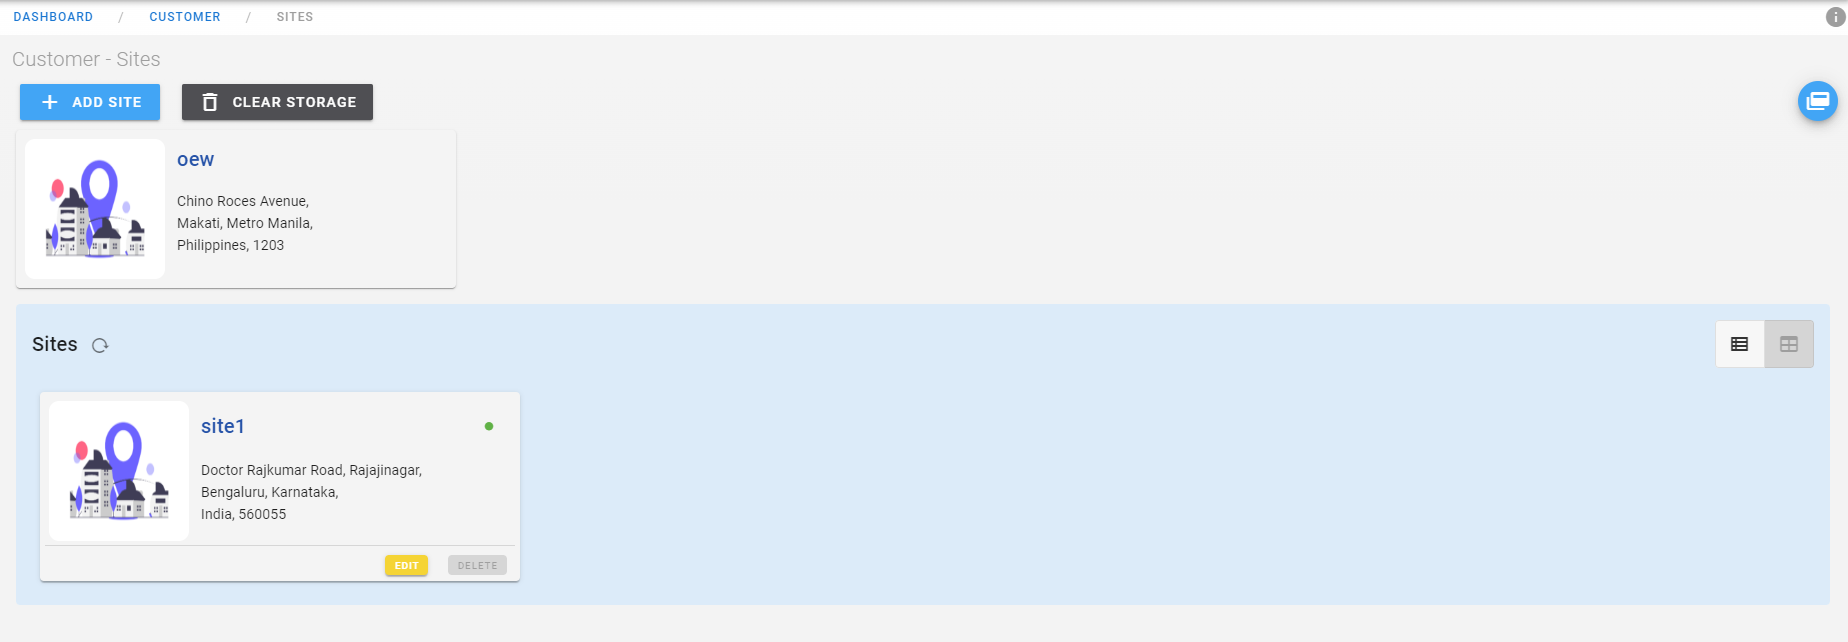
The user is given the provision to edit and delete the sites and also create and view devices linked to that site by clicking on the required site card which opens up the site/id page as shown below.
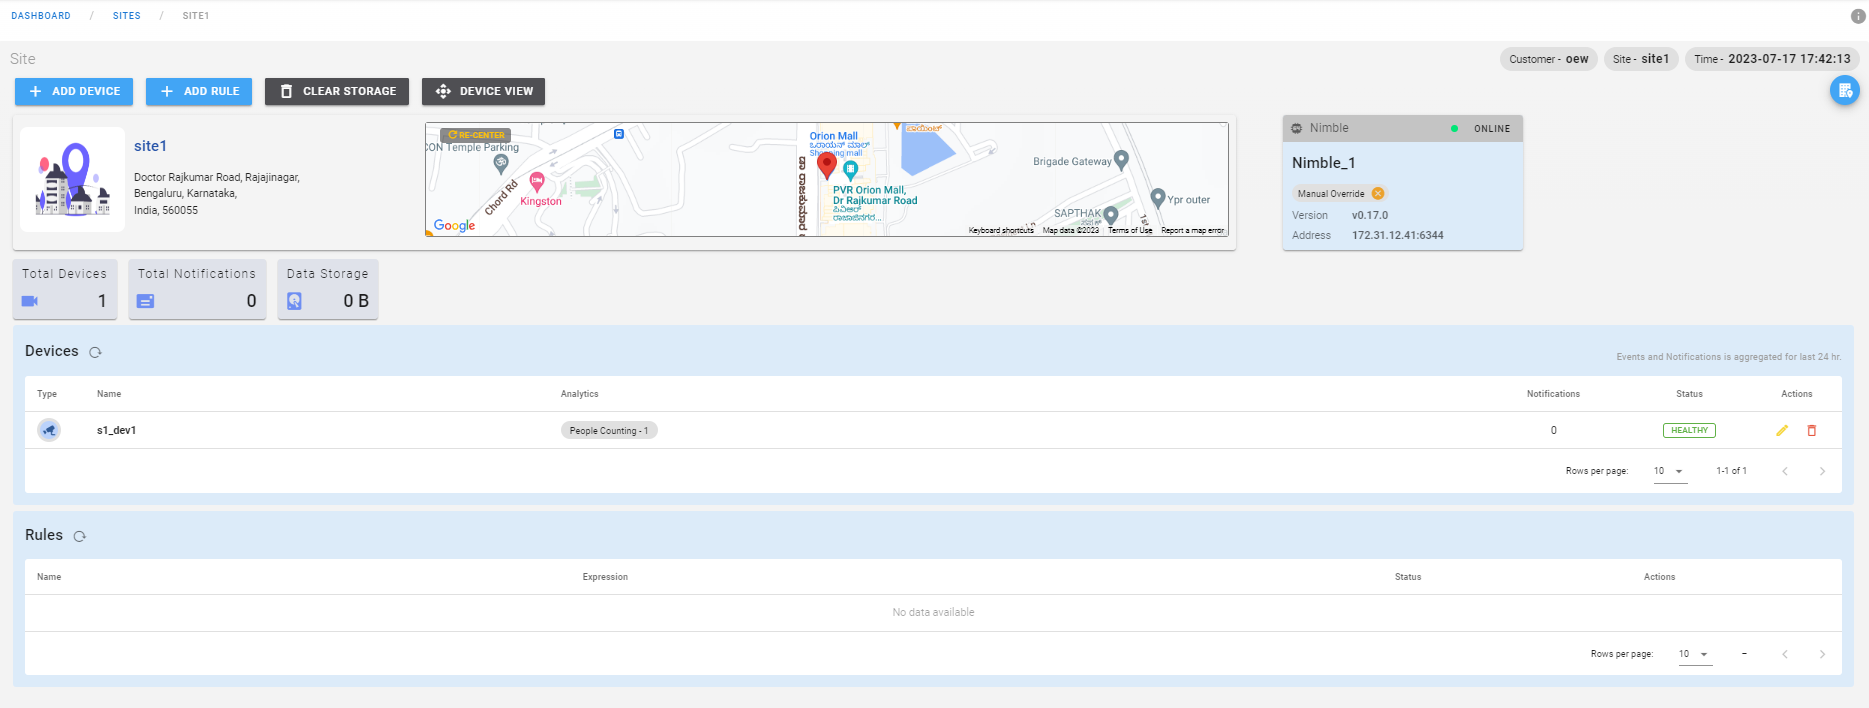
This page provides all the details of the selected site by providing information about the site and total device name, type, analytics, notifications, status, actions. This page also provide clear storage, device view.
It also lists all the devices and rules created under that site in two different section in table format.
The user can click on any device in the devices table which takes the user to device/id page where user can add analytic and also perform other actions like edit and delete for selected devices. Users can similarly view all the rules created and perform actions like edit, delete and activate/deactivate on those rules from this page.
To edit and delete the site, the user can click on the edit option(pen icon) and delete option(bin icon) which is present on top right corner of the page.
Edit Site
Edit allows user to update the name, address and location information for the selected site. If the DB is migrated, the user can edit the timezone in site edit section, and this in turn will update all scheduler time according to the timezone selected.
Delete Site
Deletion of site will delete the site, but before this, all the devices and analytics attached to the respective site must be deleted for the site deletion to be successful.
Click on this Add device link below to know how to add a device once the site is created.