Enable Usecases
Users can enable use-cases which are not provided in the add analytics section by following two steps.
- The first step is to mount the models in the volume section of nimble docker-compose.yaml file and restart the nimble containers. Basically user should mount the models folder which contains all model information of the use-cases, and this will be added to Nimble folder during the installation of the Nimble. User must just uncomment the
./models:/home/nimble/modelsin the volume section as shown below.
version: "3.4"
services:
nimble:
image: ${NIMBLE_IMAGE}
container_name: nimble
restart: ${RESTART_POLICY}
ports:
- "6344:6344"
volumes:
#   - ./elements:/home/nimble/elements
- ./models:/home/nimble/models
- ./videos:/home/nimble/videos
The next step is to go to setting page and select the Bundle defaults option. Here, select the usecase bundle and the usecase analytics which the user wants to enable and click on the pencil icon to open the editor. This opens up a json editor window for the selected usecase analytic as shown below.
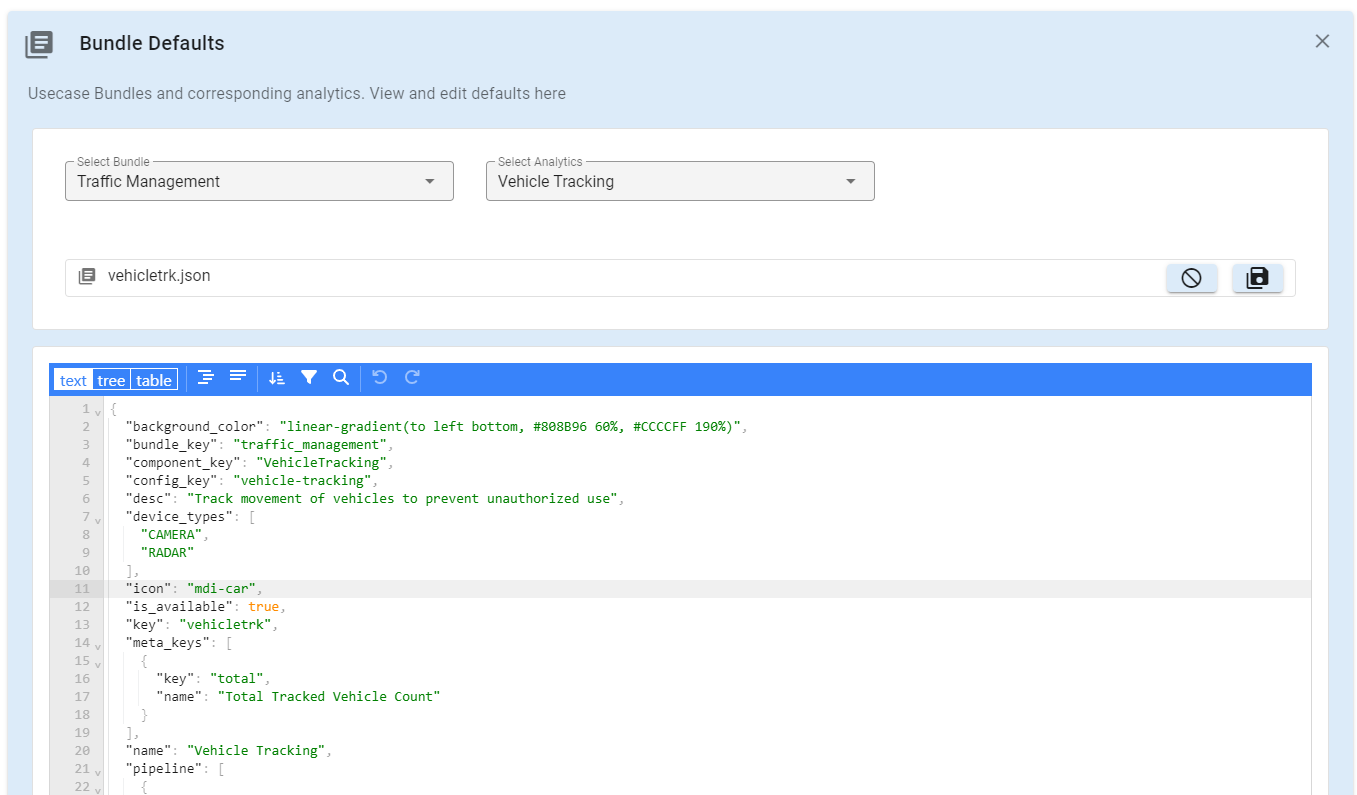
In the json file user must edit
is_available: trueto enable that usecase and click on save. This will save the changes, once this is done, click on the cancel button to close the editor.
These two steps will enable the usecase, and user can go ahead and add the enabled usecase analytic in the Add analytic section and configure the enabled usecase.