Device
Each site can have multiple devices attached to it. Once the site is created the next step is to add devices to the site.
Add Device
The user can click on the site name in the Sites table which opens up the site/id page where add device option is provided on top left corner as shown below.
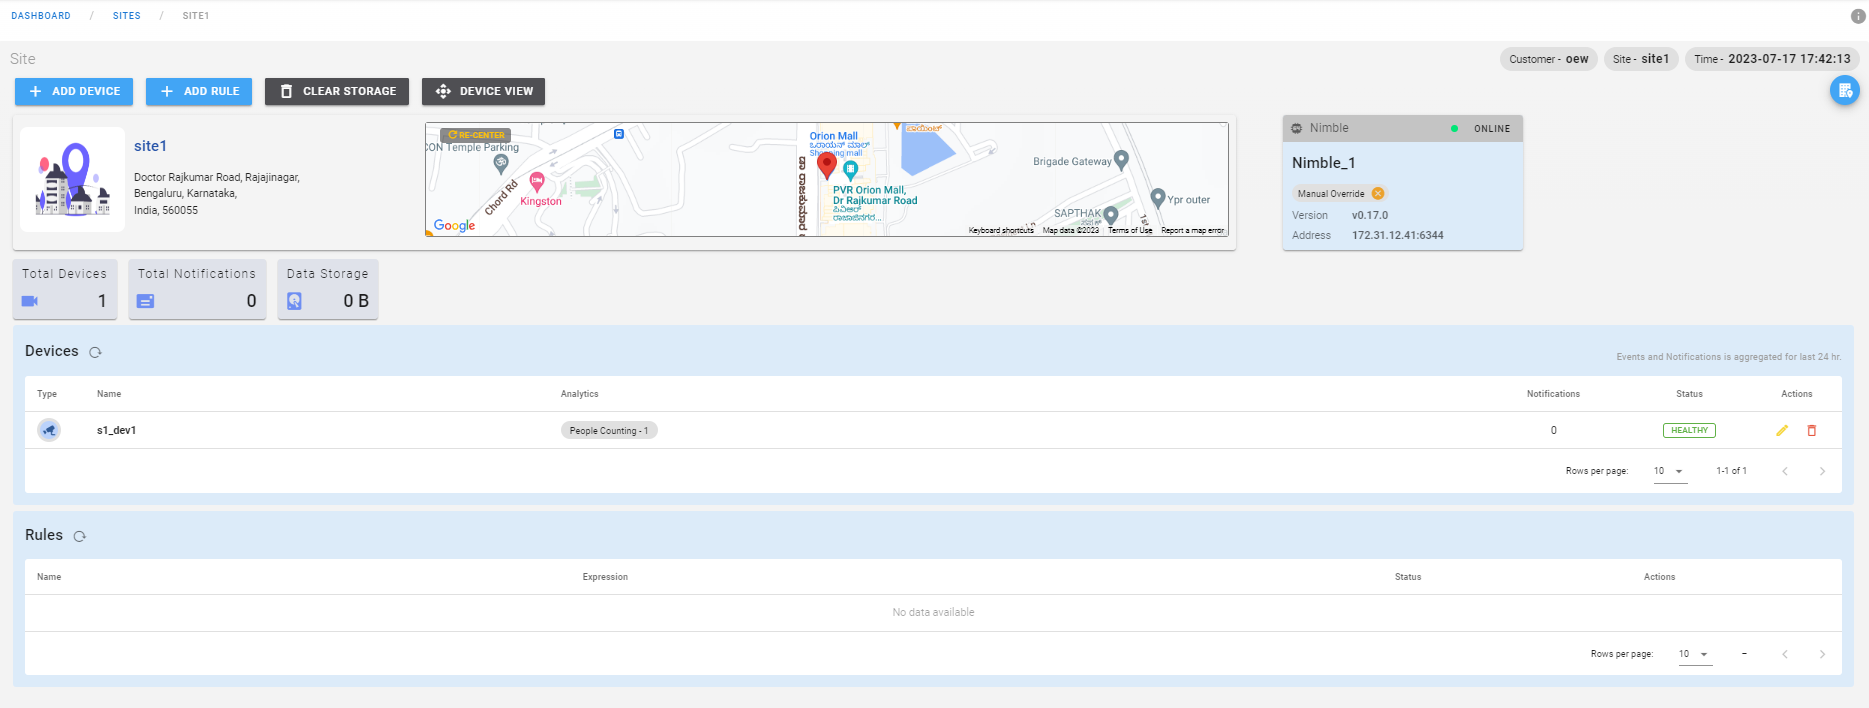
The user can click on add device button which opens up a create device form popup as shown below.
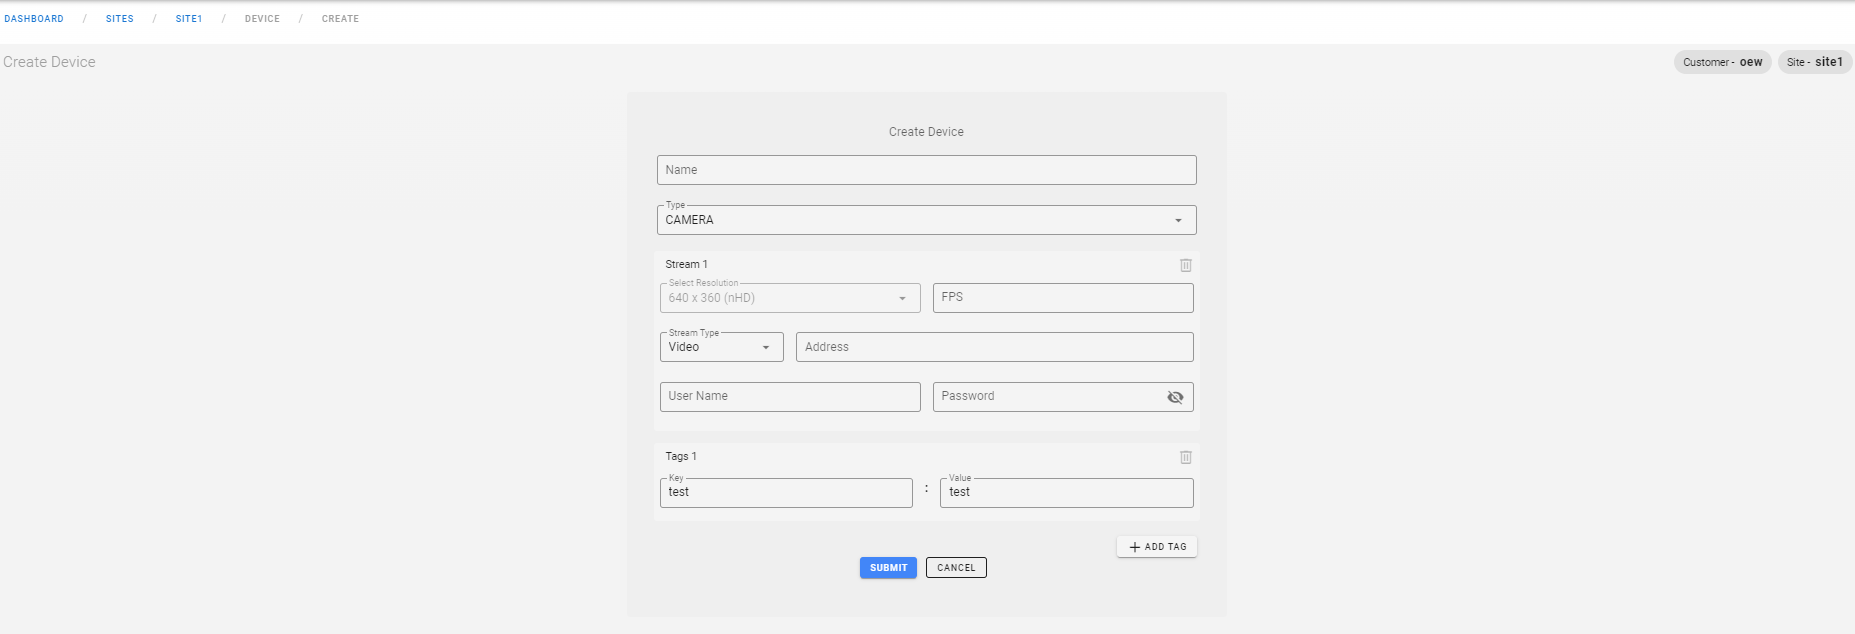
Here the user must fill in the device name, device type(i.e. acoustic, Camera, GPS, motion, radar), FPS, stream type( i.e. video, file, zmq), source address, username and password (for rtsp url if present) and add tag name and tag value and click on submit to create a device with the given source. This opens up an assign nimble configuration popup as shown below.

Here the user must select the nimble that must be attached to the device from the drop-down menu and click on submit, that creates the device with the assigned nimble configuration.
This creates the device with the provided source and redirects to device view page which is shown below. This page displays all details of the Nimble attached like name, manual override, status(online or offline), version, address and port details on the right side of the channel stream. The below image displays the device view page.
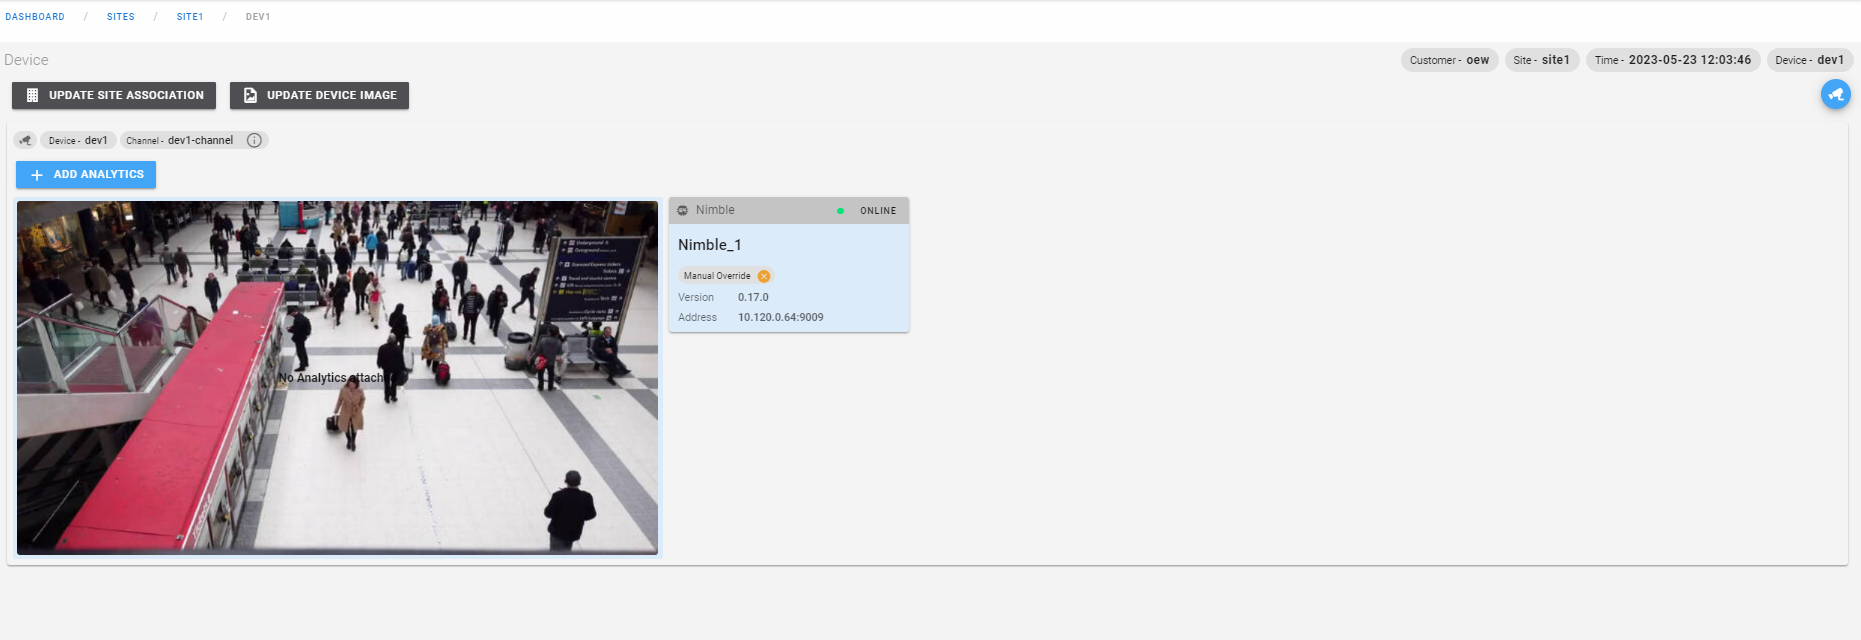
Here the user can also get more info of the channel by clicking on the info icon (i) on channel card on top left. When clicked it opens up a dialog as shown below.
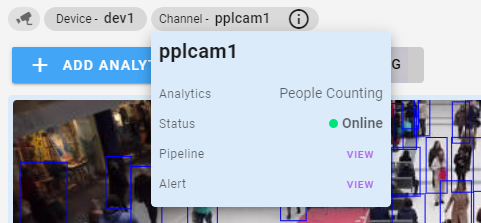
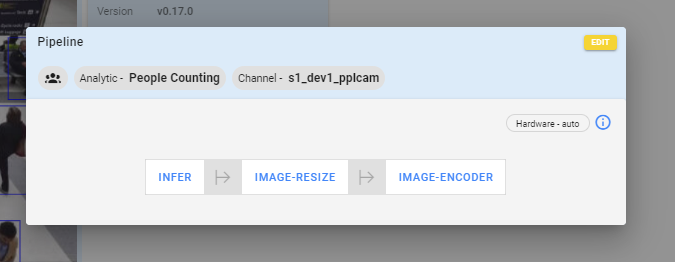
The user can also click on the info icon to get details of the channel name, Analytics attached, status of the channel, pipeline and alert details. The user can click on view icon there to view pipeline details which opens up a popup as shown below.
Similarly, user can click on view icon there to view all alerts that are created in the selected channel as shown below.
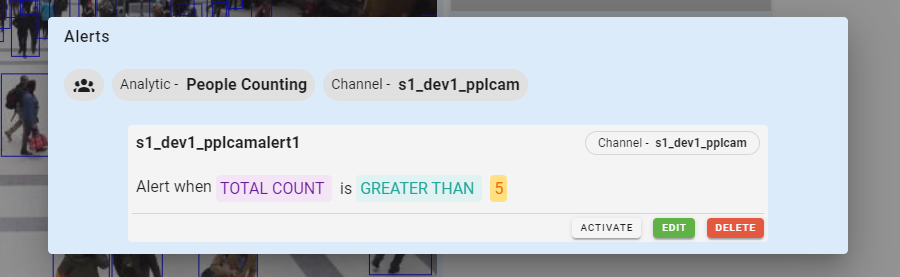
Here the user can do right-click on the alert card, and he/she gets options to activate/deactivate, edit, delete alert.
The device view page has different options like Update site association, Update device image and Add Analytics option.
The users can update the site associated with the device using Update site association. When clicked on the above option it opens up below dialog as shown below.
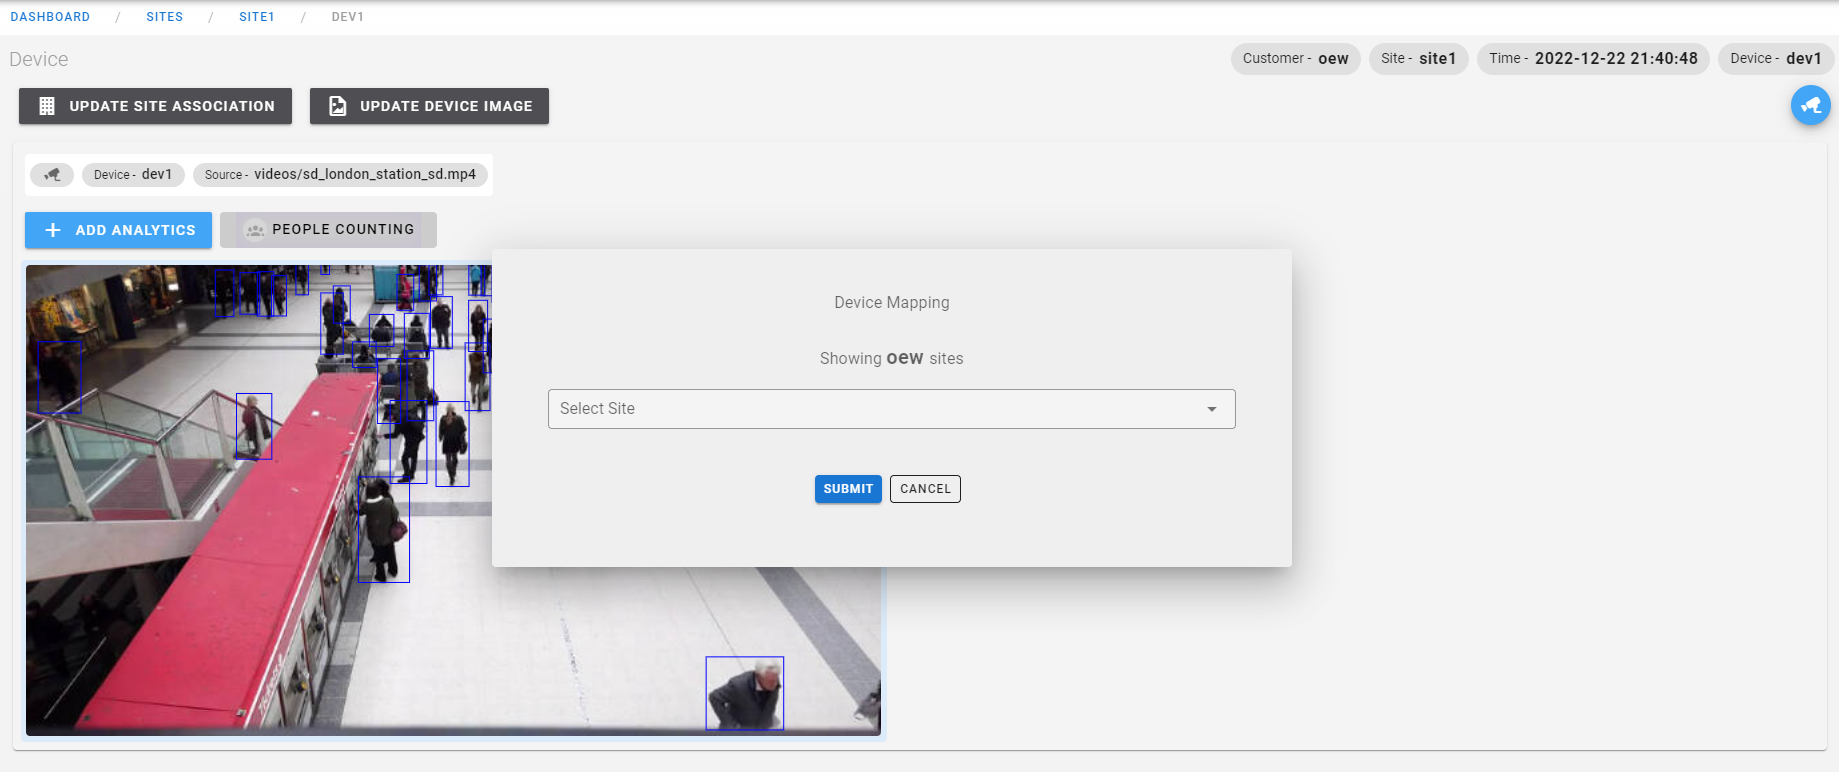
Here the user can select the site to which he/she wants to associate the current device and submit.
Before updating the site association, all rules in that site must be cleared off(i.e, deleted), inorder to perform update site association otherwise it shows the user the message that they are not allowed to do so. Also when site association is updated all schedulers' timezone will be updated according to the latest site timezone, and all scheduled alerts will get activated and deactivated wrt new timezone time.
Update device image option is used to update the device image from the video playing in the device view page. If the user stays for a minimum of 5seconds in this page, the device image is captured and user is notified that device image is updated successfully. The other way is to just click on the option and the device image gets updated. This updated device image is used as a reference while creating alerts in site alerts page.
To understand where it is used, go to site alerts page and check for the 3rd step i.e. selected channel.
Site Alerts
Once the device is created with the provided source and nimble configuration, the user is landed in the device view page where user can add analytics for the device. Click on the below Add Analytics link to know how to add Analytics for the created device.