Deployment
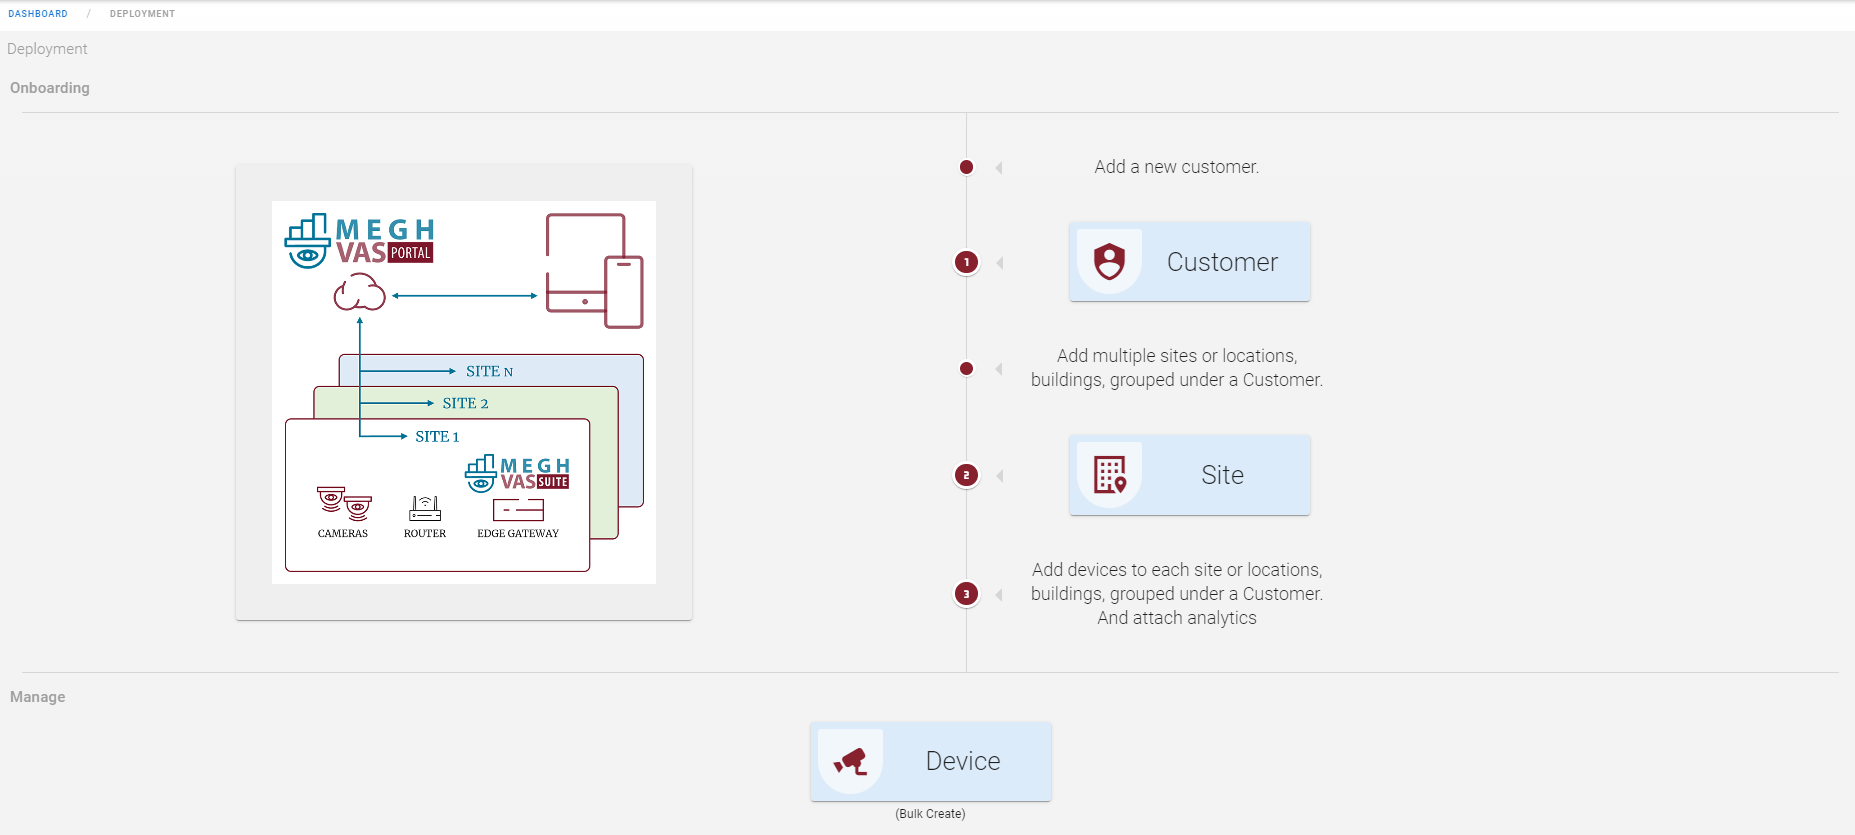
The first step in the boarding process is to onboard customers for user's organization.
1. Onboard Customer
The user can click on onboard customer and create a customer.
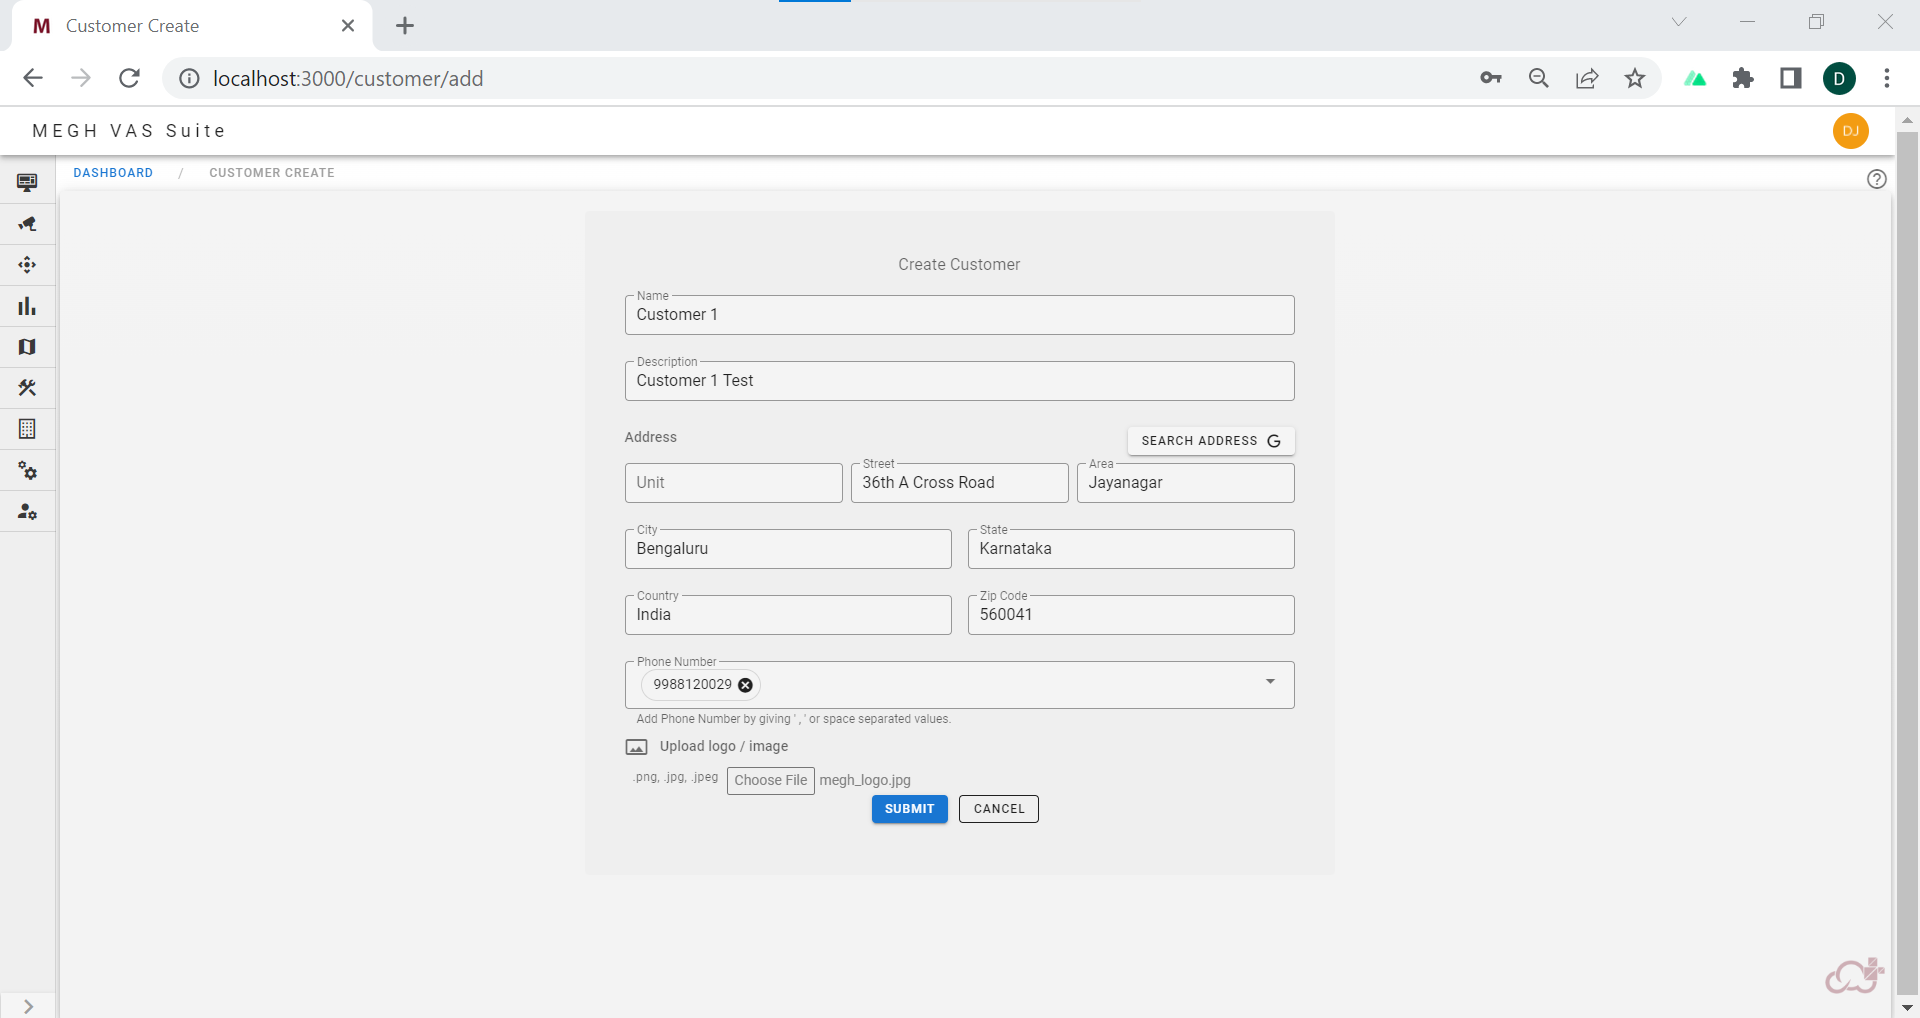
The user must provide the name of the customer with description, customer address can be typed in or user can click on search address button to select the address from the map as shown in below image.
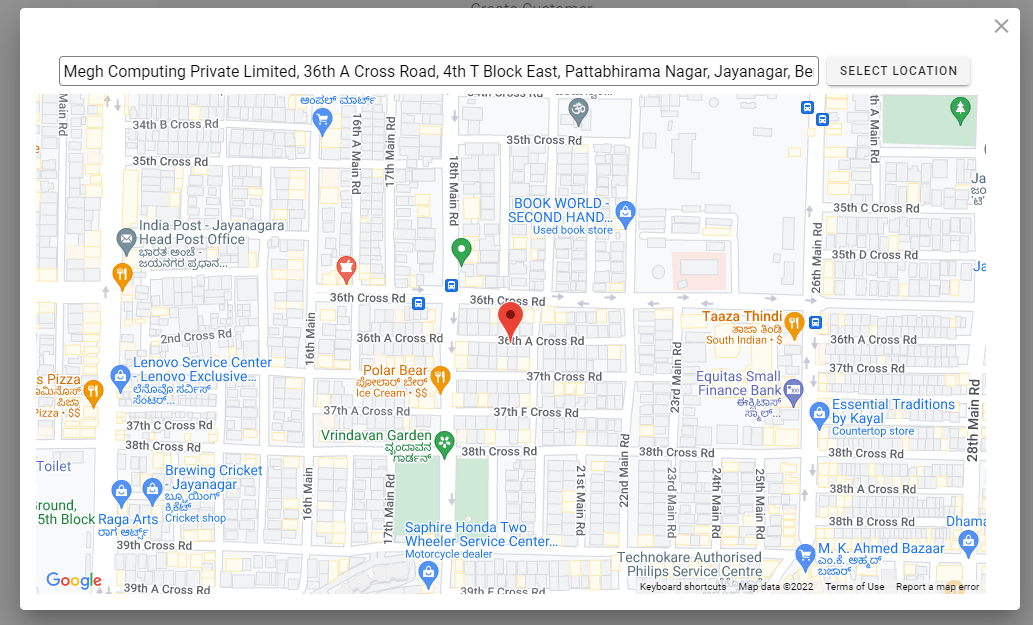
By clicking on select location, the address details will autofill in the customer create form.
The user can fill in the phone number and upload the customer logo image if required and click submit to create a customer.
This opens up a Customer select window where user can select the customer and that selected customer gets selected for the Megh Dashboard. The below image shows the Customer select in card view.
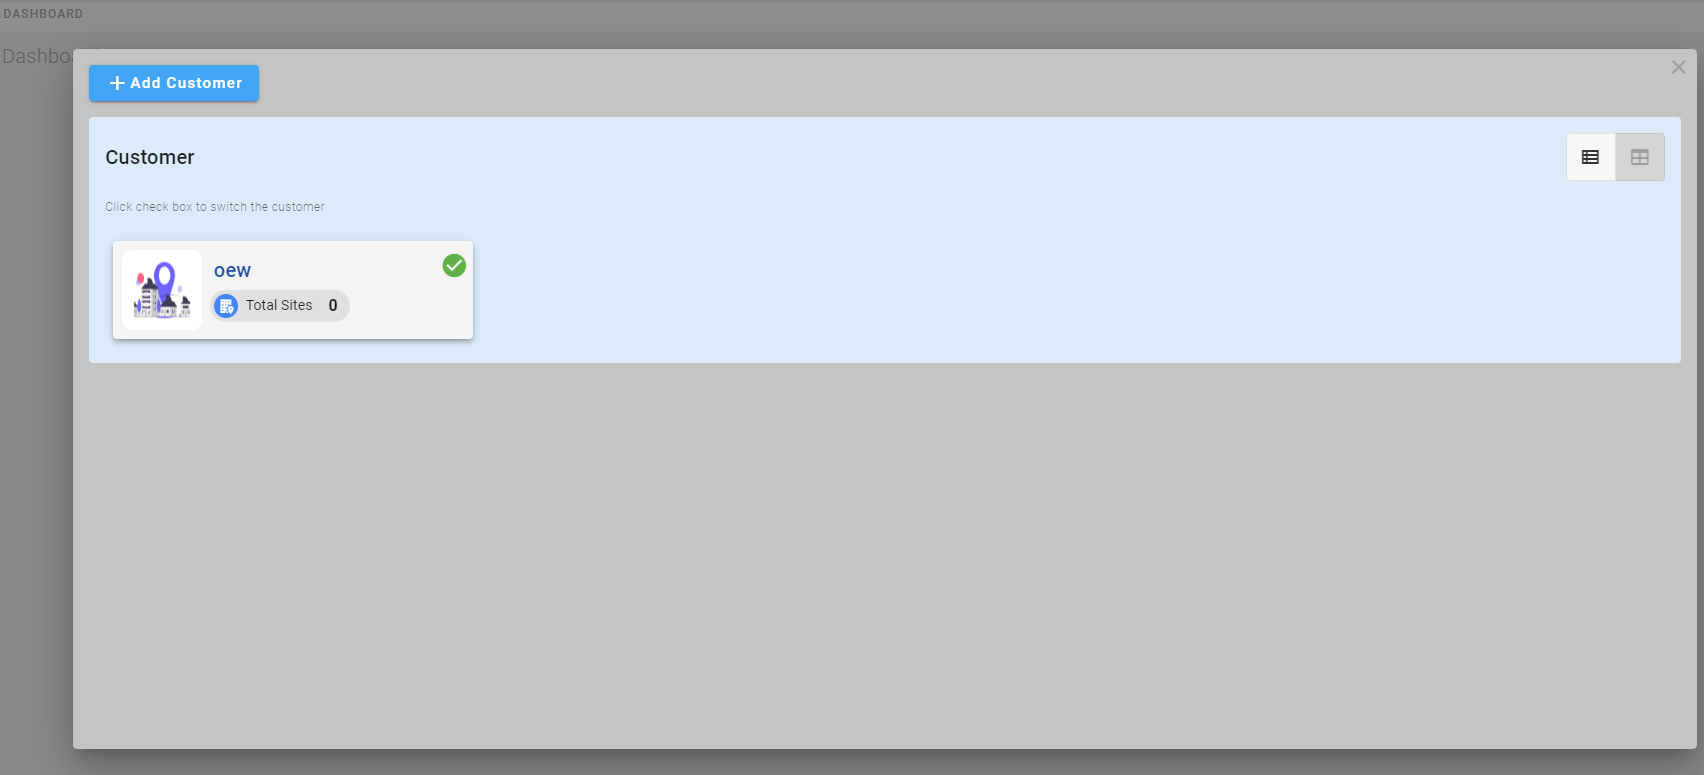
Here user can see all the customers that are deployed in the Megh Portal. It also displays total number of sites for particular customer. The below image shows the table view which can be switched from the top right corner.
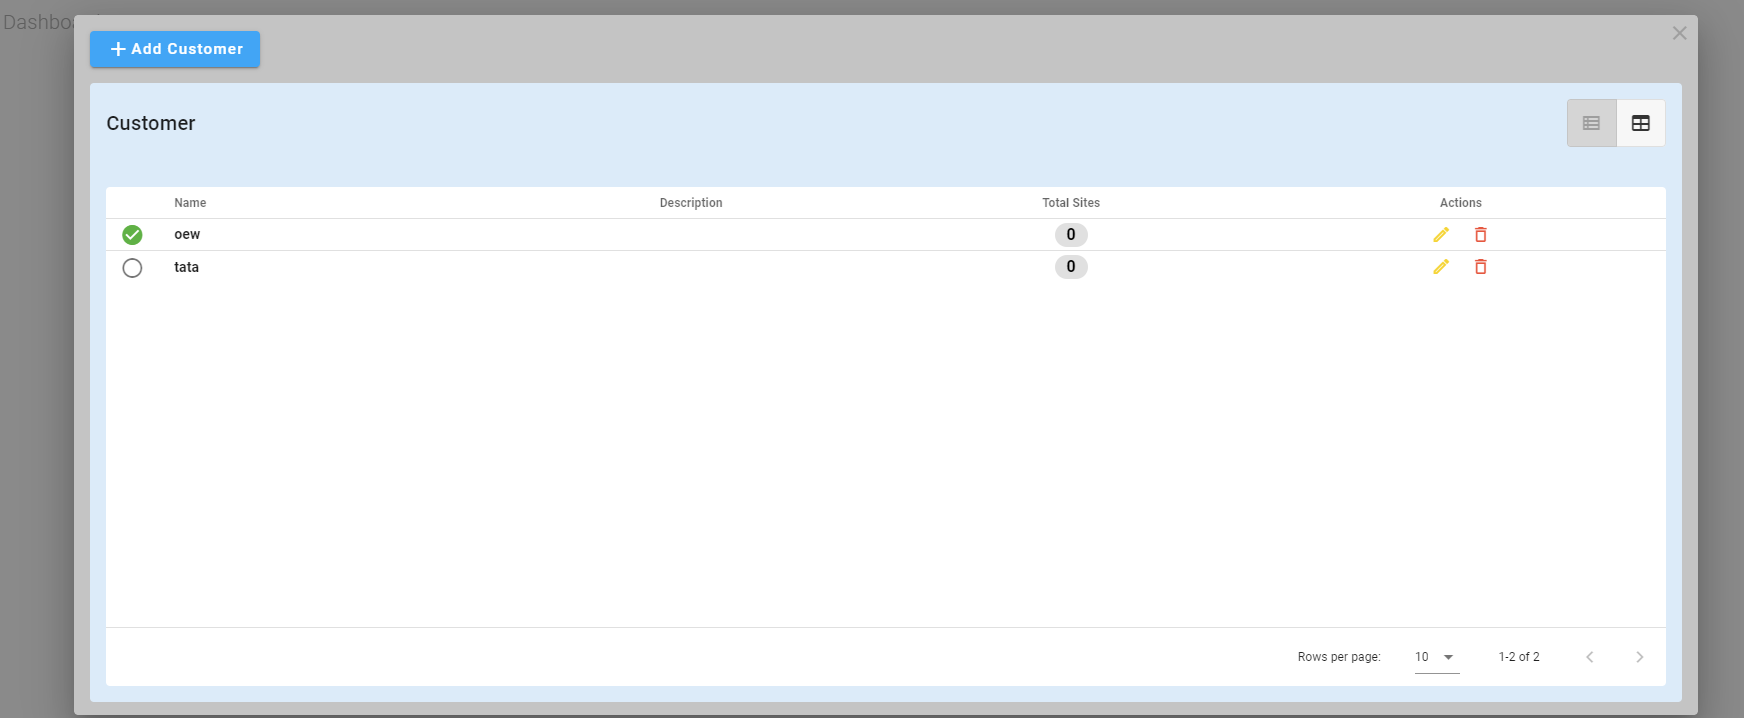
In this table view, the user can perform two actions on the created customers i.e. customer edit and customer delete. The user can click on pencil icon on the right to edit the customer details. The user can click on bin icon on the right to delete the selected customer.
The customer cannot be deleted if it has associated sites.
The next step in the boarding process is to add site for the created customers.
2. Add Site
Next step is to add sites of the customer. The user can click on the site button in the deployment page to create a new site for the selected customer. Click on the above header link to know how to add site.
Add Device
Once the site is created the user can add the device in the specified site. Click on the above header link to know how to add device.
Add Analytics
Once the device is created the user can add the analytics for that device. Click on the above header link to know how to add analytics.
3. Device Bulk Upload
This option is provided to the users for multiple device creation i.e.bulk upload of devices. A download sample template Excel sheet is provided which users can download for reference i.e. to know in which format device details must be uploaded.

The first step is to upload the Excel sheet containing the device details. Users can click on choose file option and upload the required Excel file from their system and click on continue option.
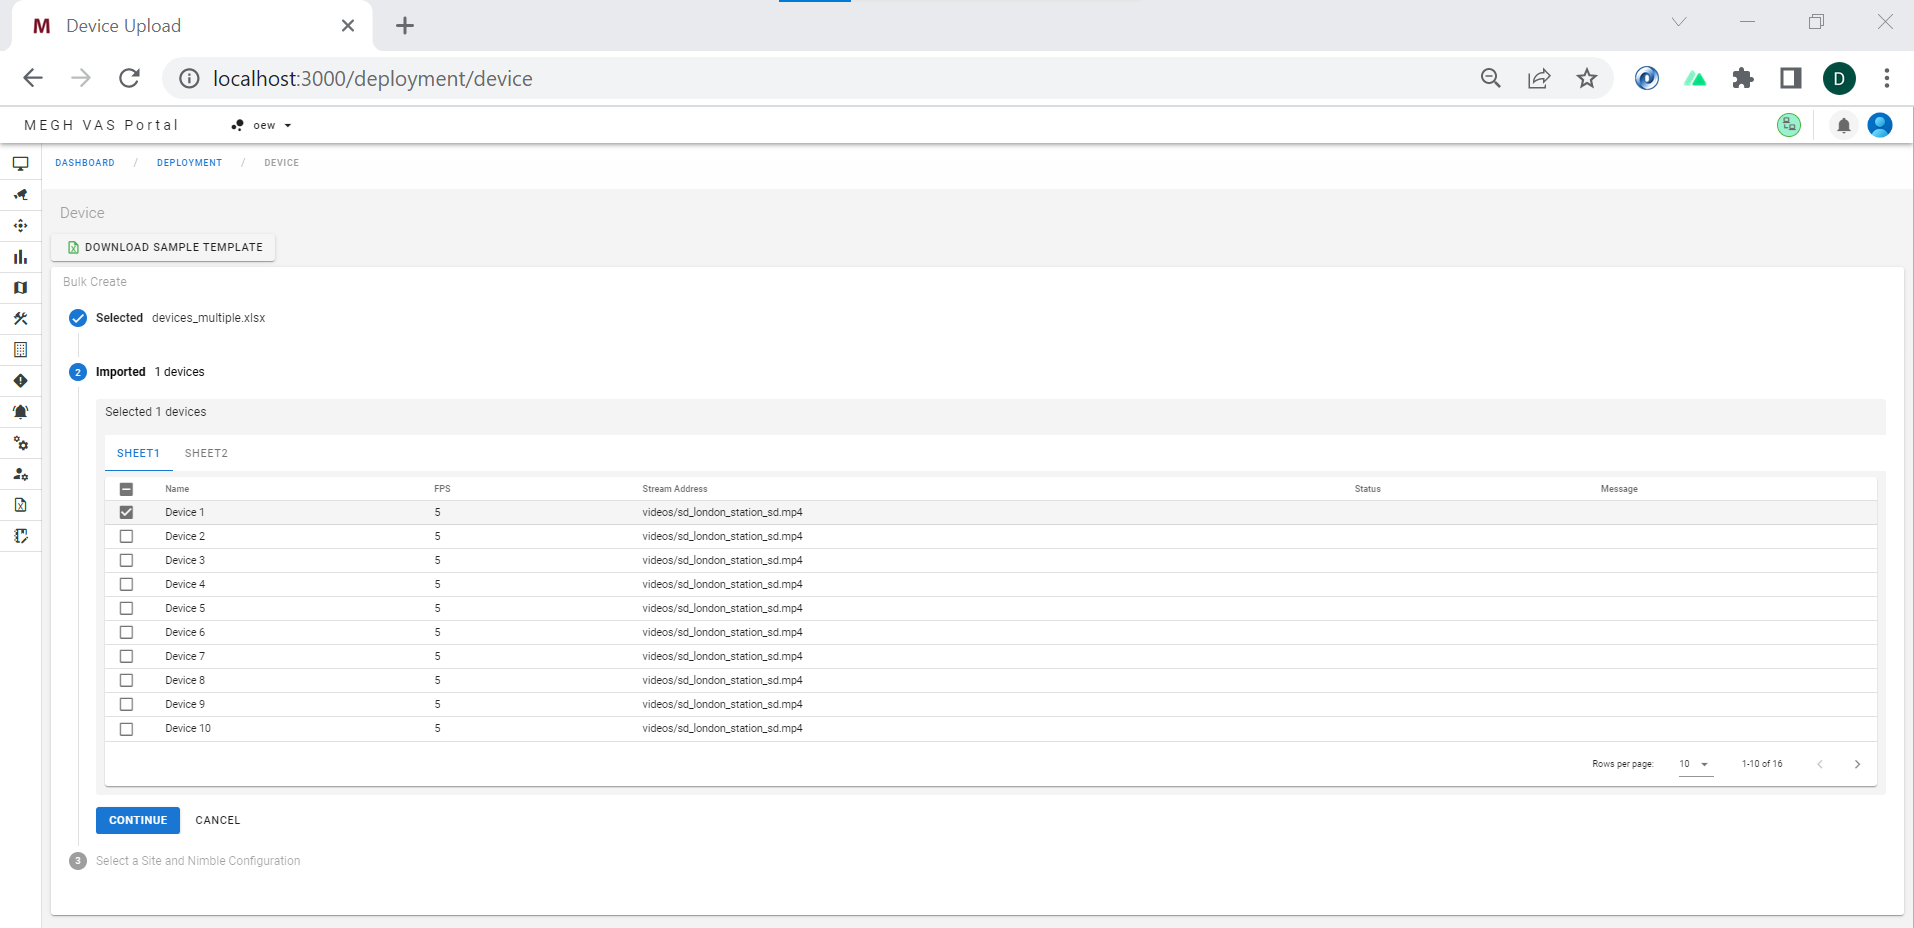
Next step is to import the devices in the uploaded Excel file. The Excel sheet uploaded is shown to the users as shown in the above image. User can select the devices which he/she wants to import and click on continue option.
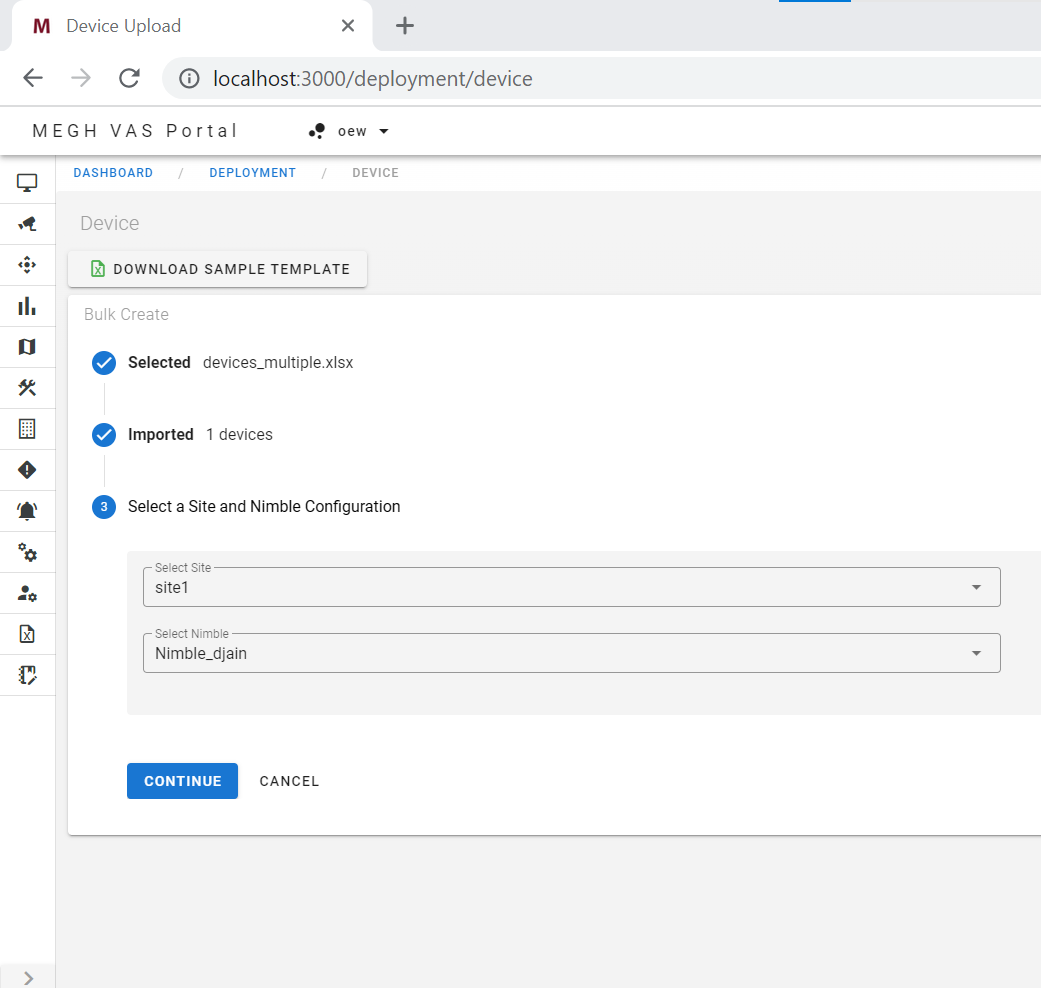 Next step is to select the site and nimble under which imported devices needs to be deployed. Once the site and nimble is selected from the drop-down user can click on continue option.
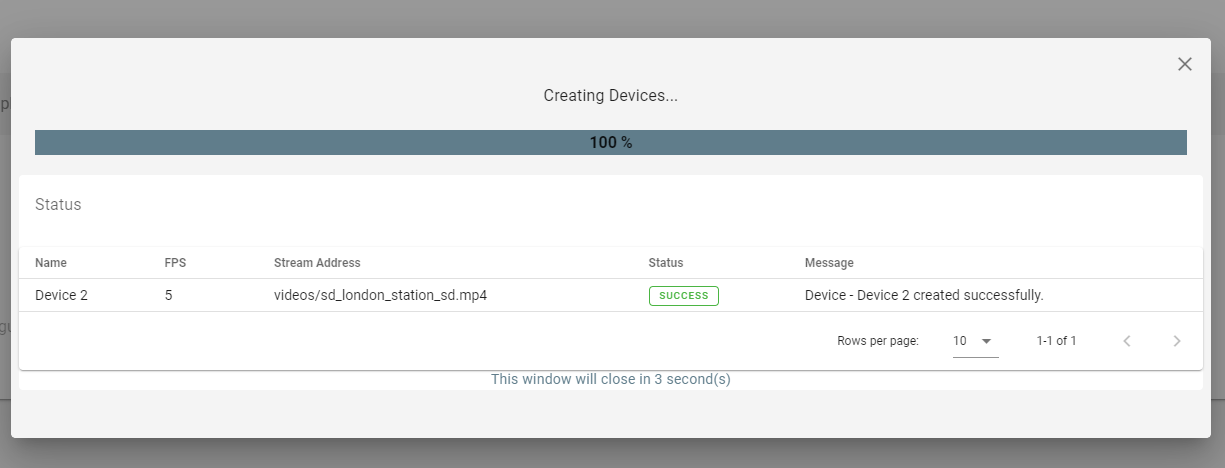
Then the creating device dialog window appears which shows the status percentage and also displays the names of the devices deployed with status as success or fail based on the deployment being successful or not. All the deployed devices can be viewed in device page.