Contextual Rule
Contextual Rule is a section where users can combine 2 or more alerts in specified site to form a contextual rule and configure trigger actions for the defined rule conditions.
Before creating a rule under contextual rule section, user must have created a site, device and channel with alert/alerts in the Megh Portal. To create a new contextual rule, user must click on add button in contextual rule section. This opens up contextual rule create page as shown below.
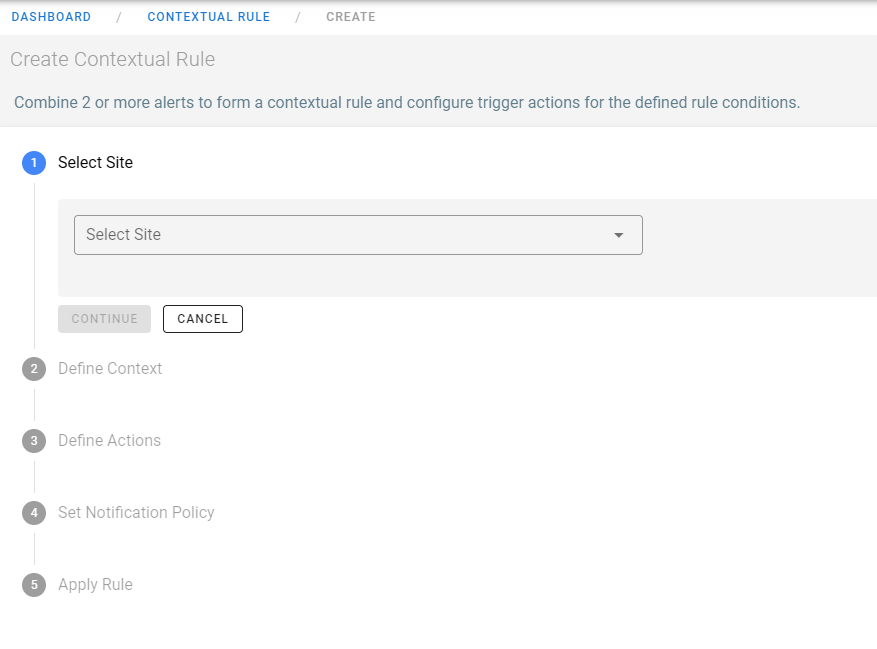
There are 5 steps in creating contextual rules.
The first step is to select site from the drop-down, under which user want to create a rule. Once done user can click on continue to move to next step or click on cancel to re-do/update the same step.

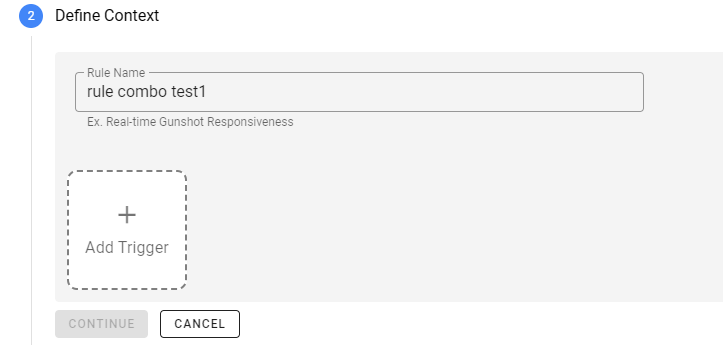
The next step is to define context. Here the user must specify the rule name. Next user can click on Add Trigger button to specify alert/alerts from which user want to create a rule.
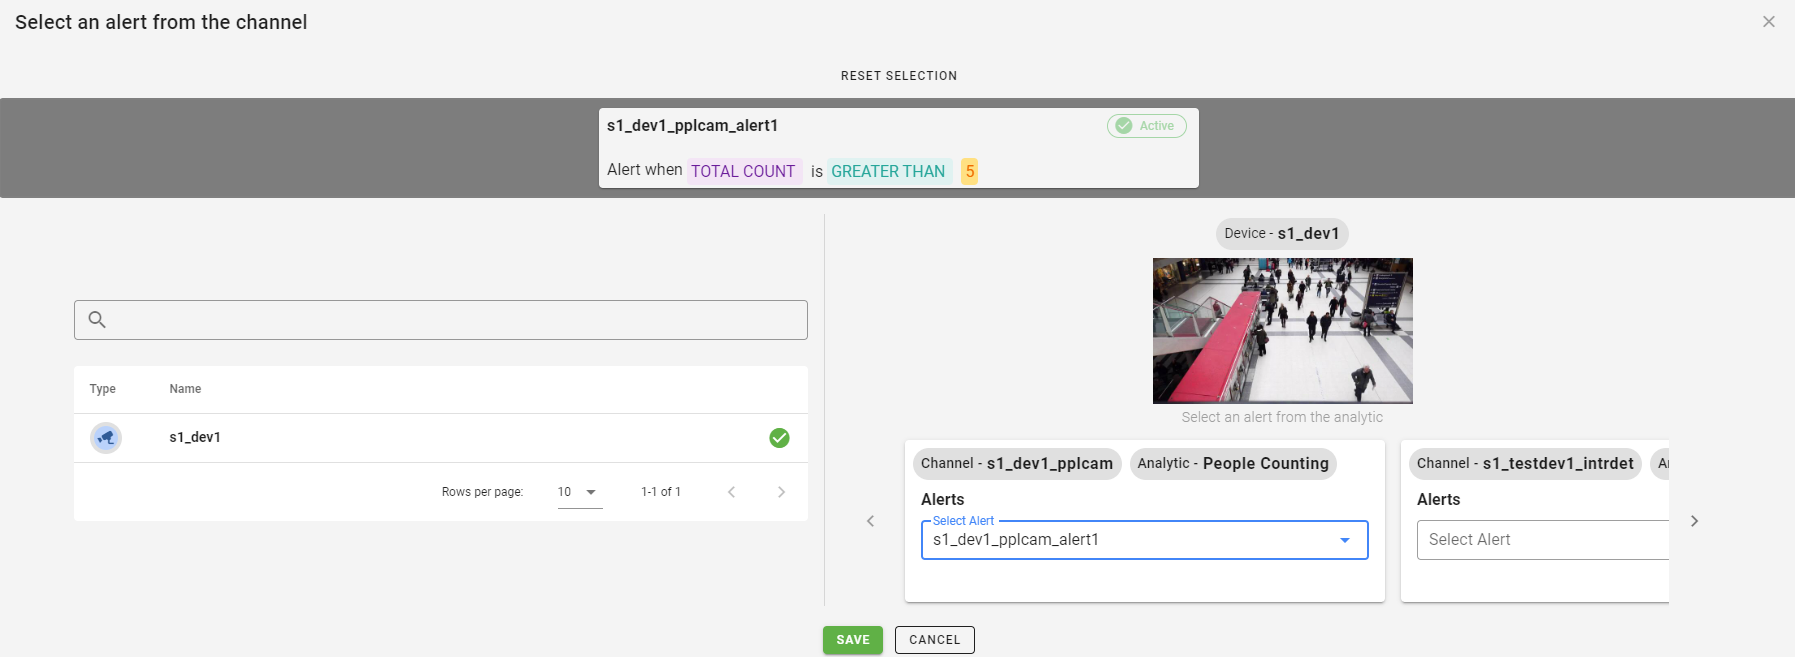
When Add Trigger is clicked, it opens up a select alert window which lists all devices in the selected site in the left pane and all alerts of different channels belonging to the selected device on the right pane. User can navigate to a specific channel by using arrows and select required alert from the specific channel drop-down as shown in the below image. The selected alert will be displayed on the top center. User can verify and click on save, and the selected alert will be added.
Similarly, user can add multiple alerts by clicking on add trigger. This will list all alerts that is added to the trigger and alerts can be seen combined with
ANDcondition by default as shown in the below image. Here the two alerts from site1 are combined underANDcondition to form the rule specified asRule combo test1.noteANDcondition means all the valuesANDcombines must be true to get a true. For example, in the above scenario both alert1 condition and alert2 condition must be true to satisfy theANDcondition to execute the rule.ORcondition means at least one of the valuesORcombines must be true to get a true. For example, in the above scenario either of alert1 condition or alert2 condition must be true to satisfy theORcondition to execute the rule.

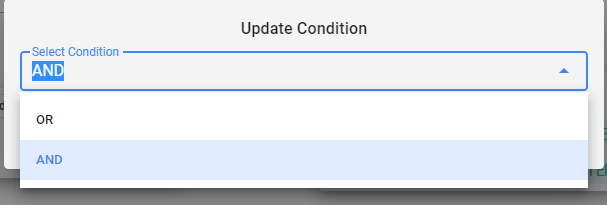
But the user can update the condition by clicking on AND button which opens up select condition drop-down. Here user can select AND or OR condition from the drop-down as per the requirement.
The Next step is to define actions. Here the user must click on add action button which opens up a drop-down menu with three options i.e. E-mail, SMS, Push Notification and Webhook.

In this step user can configure a type of action (i.e., E-mail, SMS, Push Notification and Webhook) through which they want to receive notifications for the created rule. User can configure similarly how the actions are configured in the alert configuration section while attaching a rule.
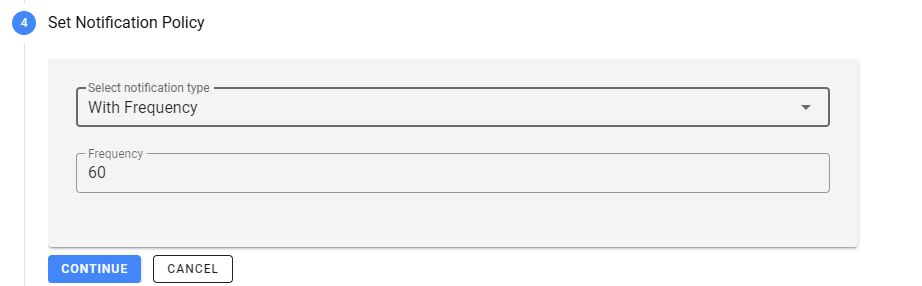
The next step is to set notification policy. Here the user has to select the frequency with which the rule notifications must be sent as shown in the below image. By default, its 60 seconds i.e., rule notifications will be sent for every 60 seconds, user can update the frequency as per their requirement.
The next step is to apply the rule. Here the user is previewed with the rule definition of the rule created by the user. This contains the action type, alerts, notification policy and conditions involved in the rule. User can just click on submit to create the rule or click on cancel to re-do/update any details in previous steps.
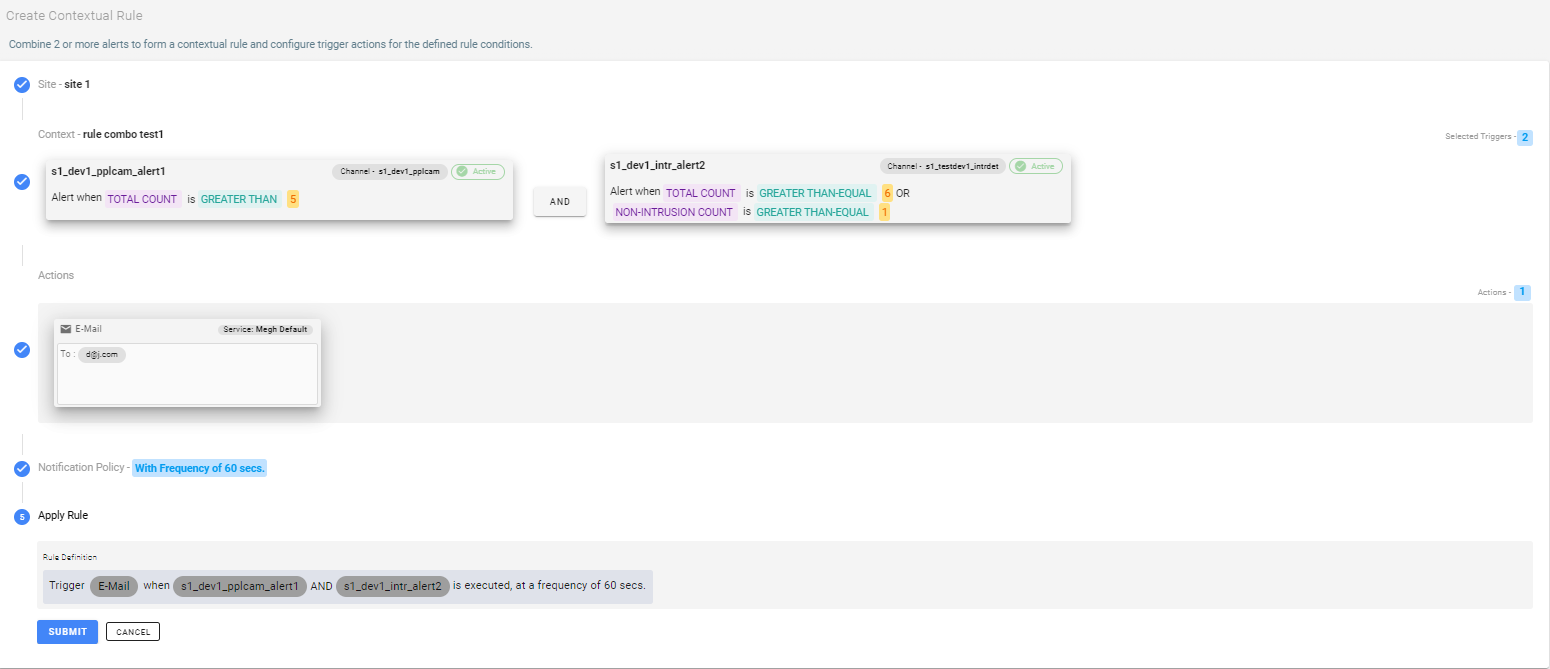
Once the user clicks on submit, the user will be redirected to a specific site/id page where he/she can view the created rules under the rules section.

Here the user can see the name, expression, status, actions for the created rules. Under actions user can edit the rule using pencil icon, delete the rule using bin icon and activate/deactivate the rule using the activate/deactivate button provided. The user can click on the gray expression section which opens up a rule popup as shown in the below image.
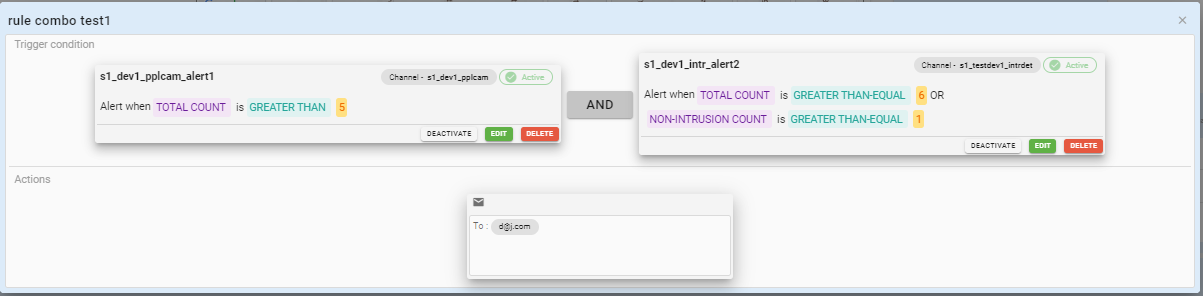
This popup shows the rule trigger condition and actions. The rule trigger condition section lists all the alerts and user can deactivate, edit, and delete the alerts from here. The rule actions section lists all the actions created for the selected rule.