Usecase
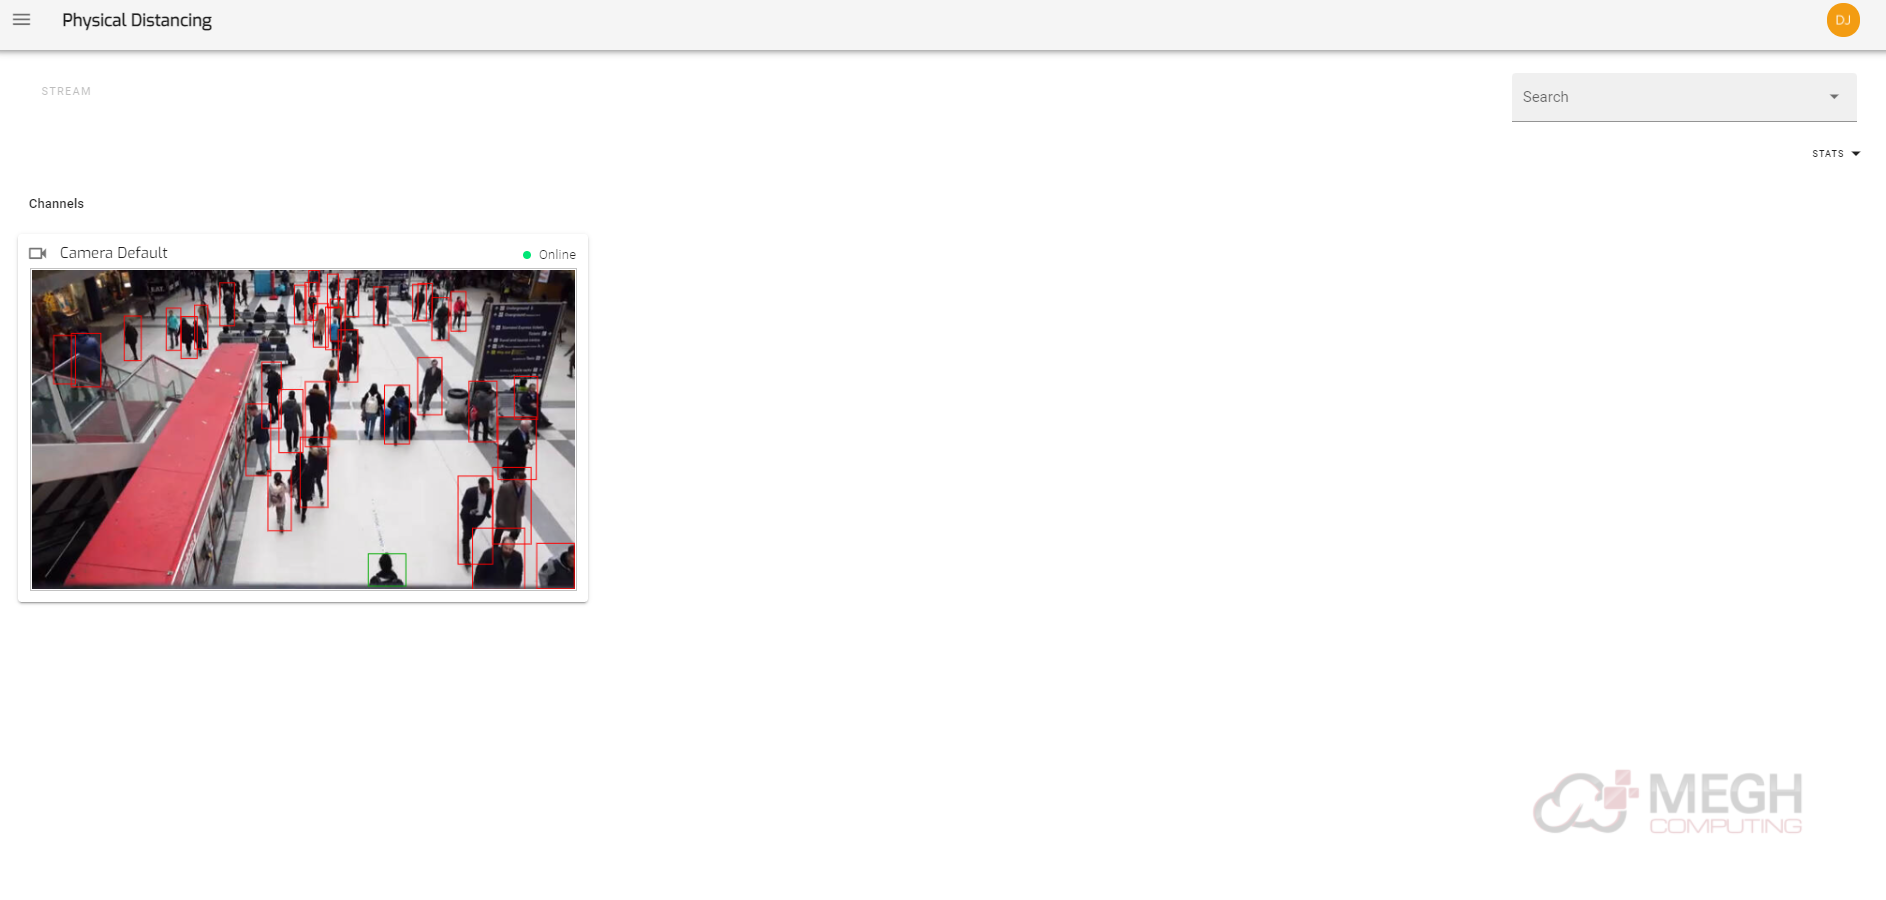
- When the user clicks on any of the use-case card, the user can see the usecase for that particular use case in the usecase page.
- The above page also shows different options like Search to search for channels and stats which displays the details of alarms, notifications, violations, non-violations and total detections of that channel.
- The status of the video being streamed or not in the User interface is indicated using Online (in green color) and offline (in red color) on top corner of the videousecase.
- If the user clicks on the video usecase he/she will be directed to the Channel page which is shown below page:
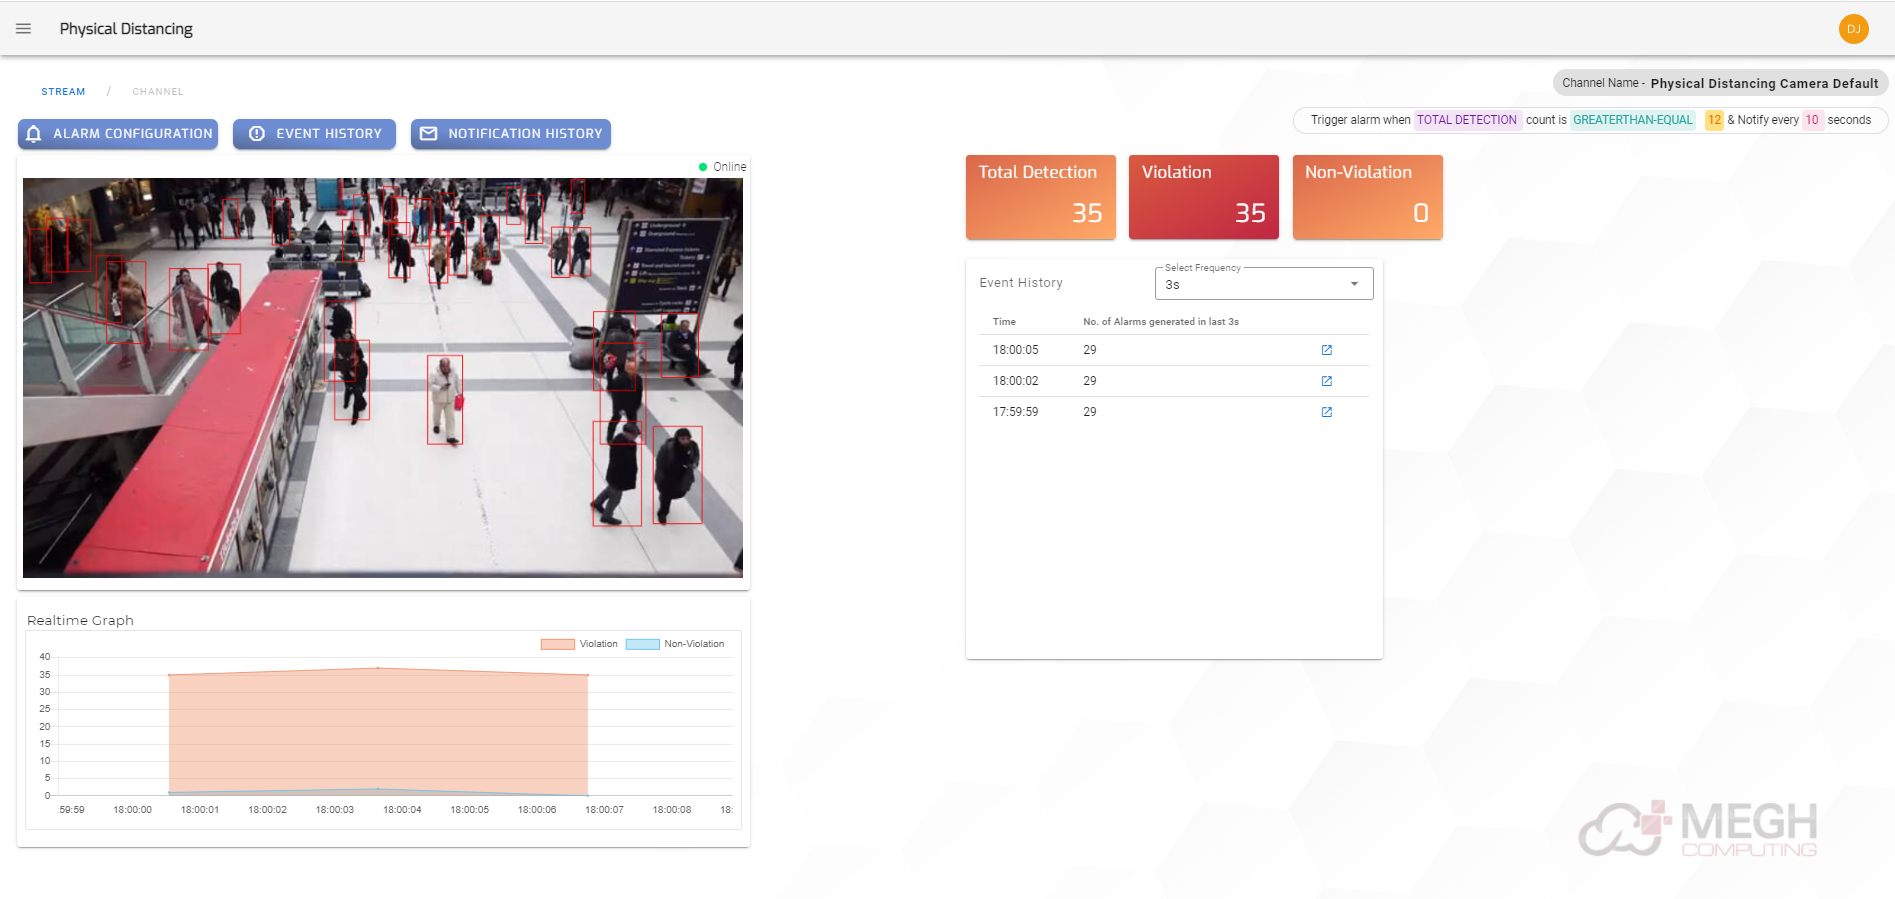
- This page displays the video usecase, Real time graph showing violations and non-violations detected for that video usecase and Event history showing number of alarms generated for the current time and frequency set.
- The channel Page also displays the Channel Name and the Active Alarm Condition set for that channel on the top right corner.
- There are 3 buttons provided namely Alarm Configuration, Event History, Notification History on the channel page.
Alarm Configuration
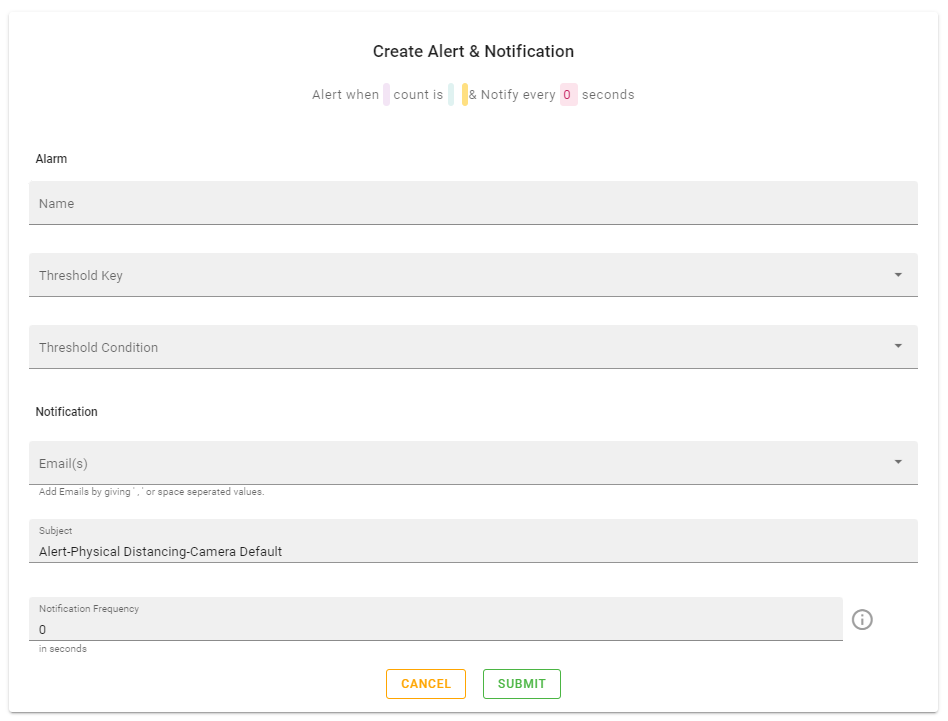
The user can create an alert as per his/her requirement using the Alarm Configuration button. The user must fill following information to add an alarm:
- Name : Provide a name for the alarm. For example, if you are setting an alarm for Physical distancing use-case and you want to alert based on number of violations then alarm name can be Phydist_violationalert.
- Threshold Key: In this field user must specify the key for which the alarm is to be created, for this the user is provided with options in dropdown list. For example- Total detection, Violation, Non-violation are provided for Physical distancing use case, these options can differ according to the use cases for which alarm is being configured.
- Threshold Condition: The user can set an alarm for different threshold conditions namely:
- Equal : To generate an alert when Threshold value is equal to the specified number given by the user
- In-Range: To generate an alert when Threshold value is in between the specified numbers given by the user i.e for this the user must provide minimum and maximum threshold values and alerts are generated for values inside this range and also for minimum and maximum threshold values specified.
- Out-Range: To generate an alert when Threshold value is outside the range of specified numbers given by the user i.e for this the user must provide minimum and maximum threshold values and alerts are generated for values outside this range.
- Greaterthan : To generate an alert when Threshold value is greater than the specified number given by the user.
- Greaterthan-Equal : To generate an alert when Threshold value is greater than or equal to the specified number given by the user.
- Lessthan : To generate an alert when Threshold value is lesser than the specified number given by the user.
- Lessthan-Equal : To generate an alert when Threshold value is lesser than or equal to the specified number given by the user.
- NotEqual : To generate an alert when Threshold value is not equal to the specified number given by the user.
- Threshold value: In this field the user must enter the Threshold value according to the Threshold condition selected
- Email id: The user must enter the email id to which notification needs to be sent. Users can give multiple email ids by using ‘,’ or space separated values.
- Subject: User can give the subject for the mail or just leave the default subject name already present.
- Notification Frequency: User must provide the time in seconds to specify how often the notification must be sent and finally click on submit to create an alarm.
- Once the alarm is created the user can just do a single click on alarm to get different options i.e activate or deactivate, Edit and delete alarm which can be used based on user’s requirements.
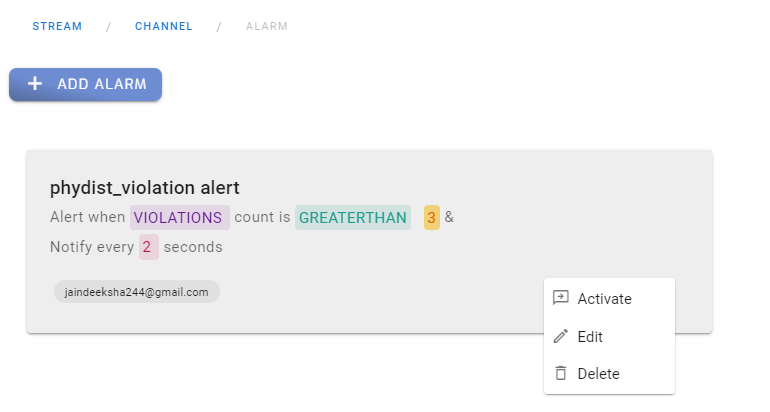
- The user must Activate the alarm to get notifications for the added alarm and if user wants to stop the alarm he/she can deactivate it.
- User can make changes to already added alarm by Edit option
- User can also delete the alarm permanently if the alarm is no longer required.
- The active alarm condition imposed on the channel will be displayed on the top right corner of the channel page as shown below:
![]()
Event History
- The Event details can be viewed in the Event History tab
- Each Event is put up according to the time with details of that use case. For example, for Physical distancing usecase, details like Threshold, Non violation, Violation and Total Detection are specified.
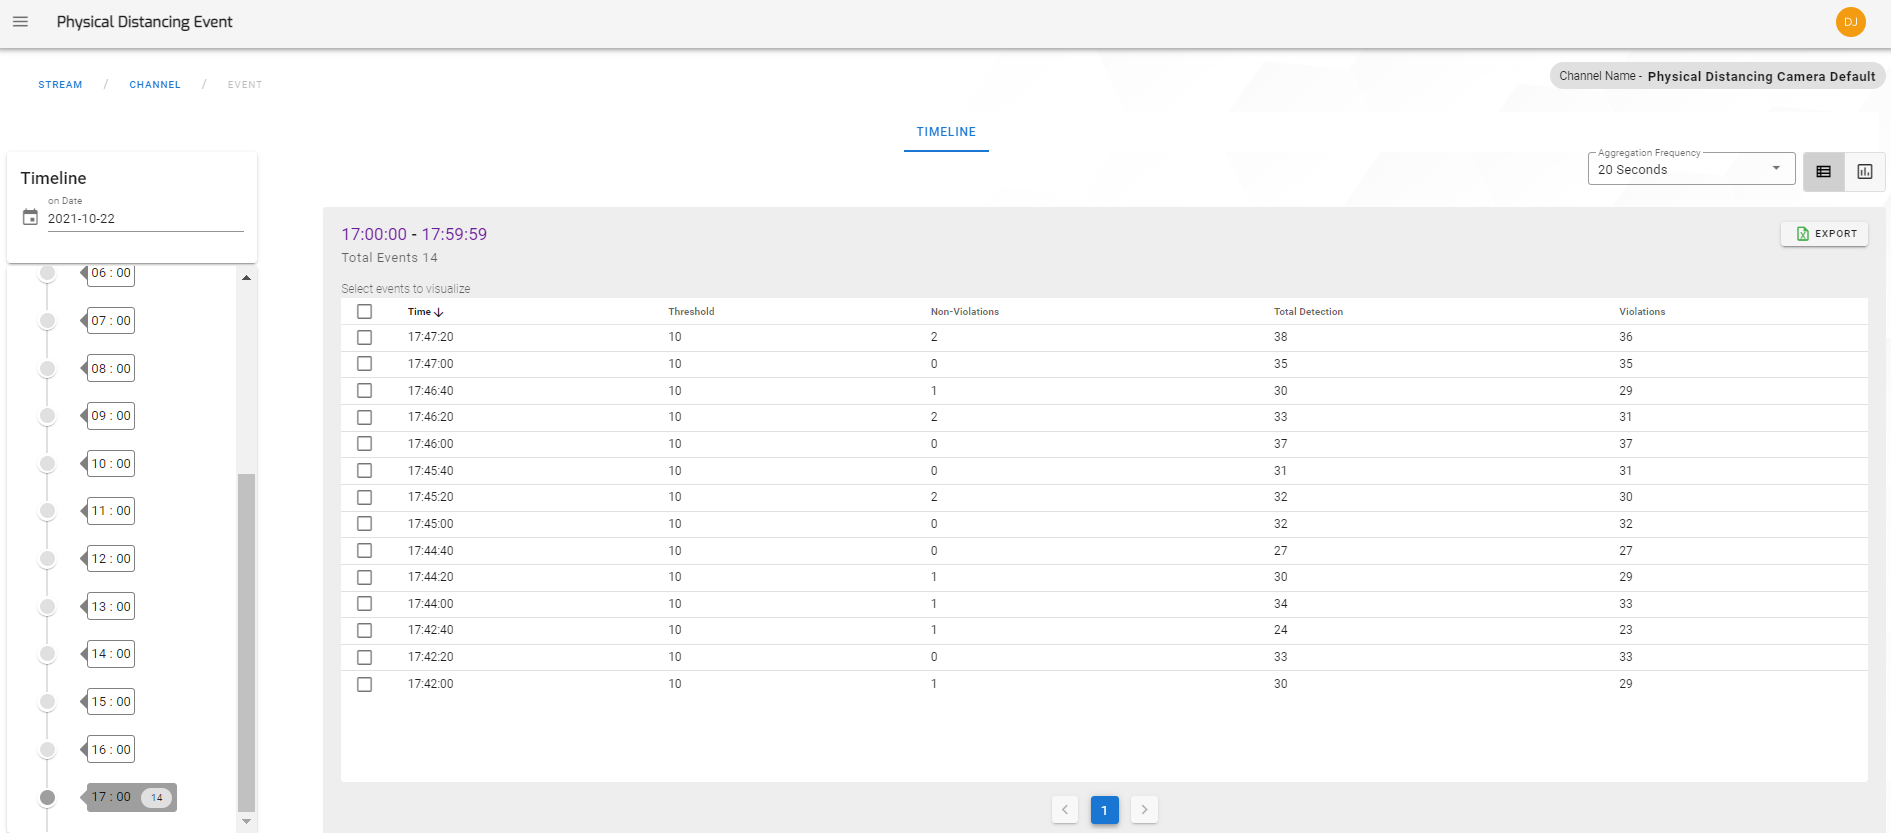
- Aggregation Frequency can be set according to the user's choice on the top right corner of the page.

- The events will be listed according to aggregation frequency, for example: if the aggregation frequency is set to 20 seconds then the events are listed for every 20 seconds as shown above.
- The Events on the page can be viewed in two different formats, this can be done by selecting the icons on top right corner :

- Table view: In this the Event details are displayed in the tabular format as shown in the above figure.
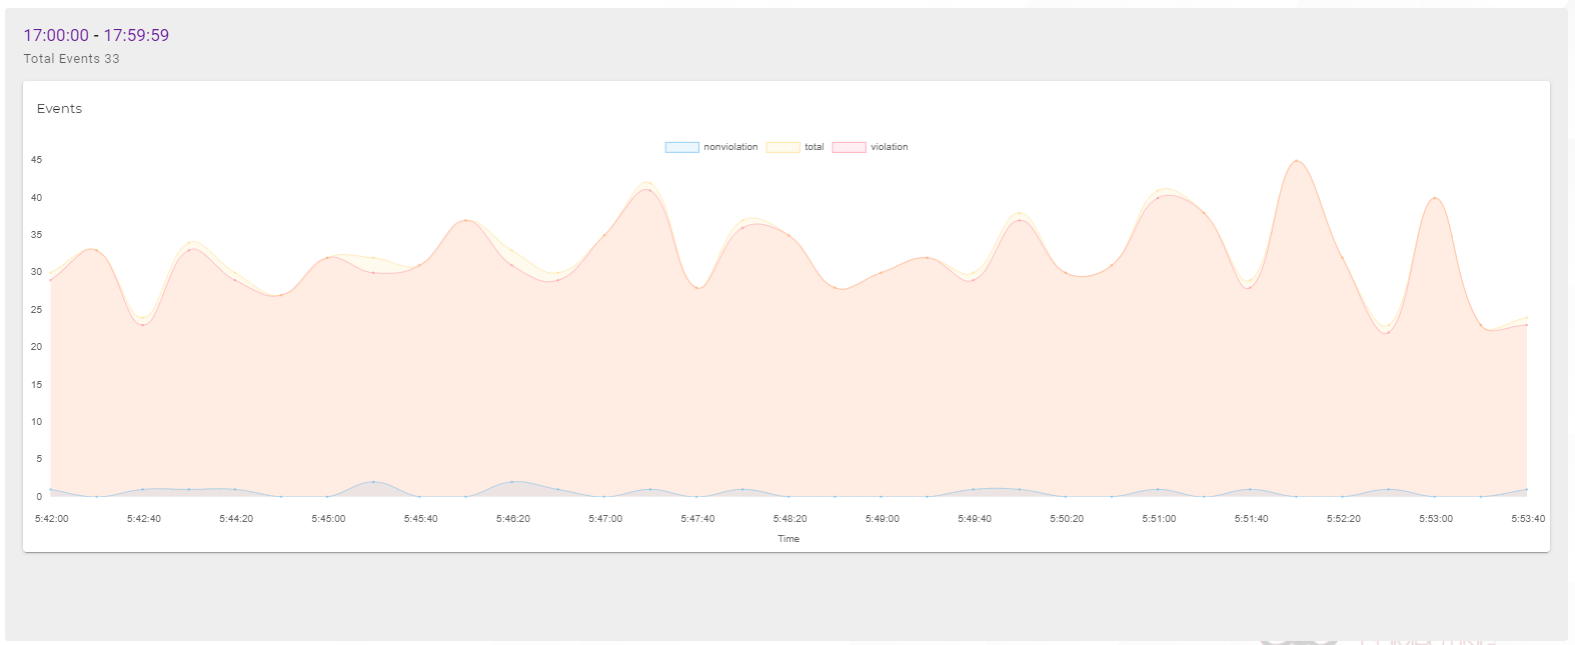
- Chart view: In this the Event details are displayed in the chart or the graph view, where the time is displayed in the X-axis and number of detections on Y-axis.The total detections, violations and non violations are represented with different colors on the chart as shown below:
- Event details can be viewed by using different tabs i.e Live and Timeline tab.
- If the Live tab is selected the live events are listed i.e events occuring at the current time and date are displayed.

- If the Timeline tab is selected the events according to selected time and date are listed.
![]()
- The event details can be exported to an excel sheet using export option on top right corner.
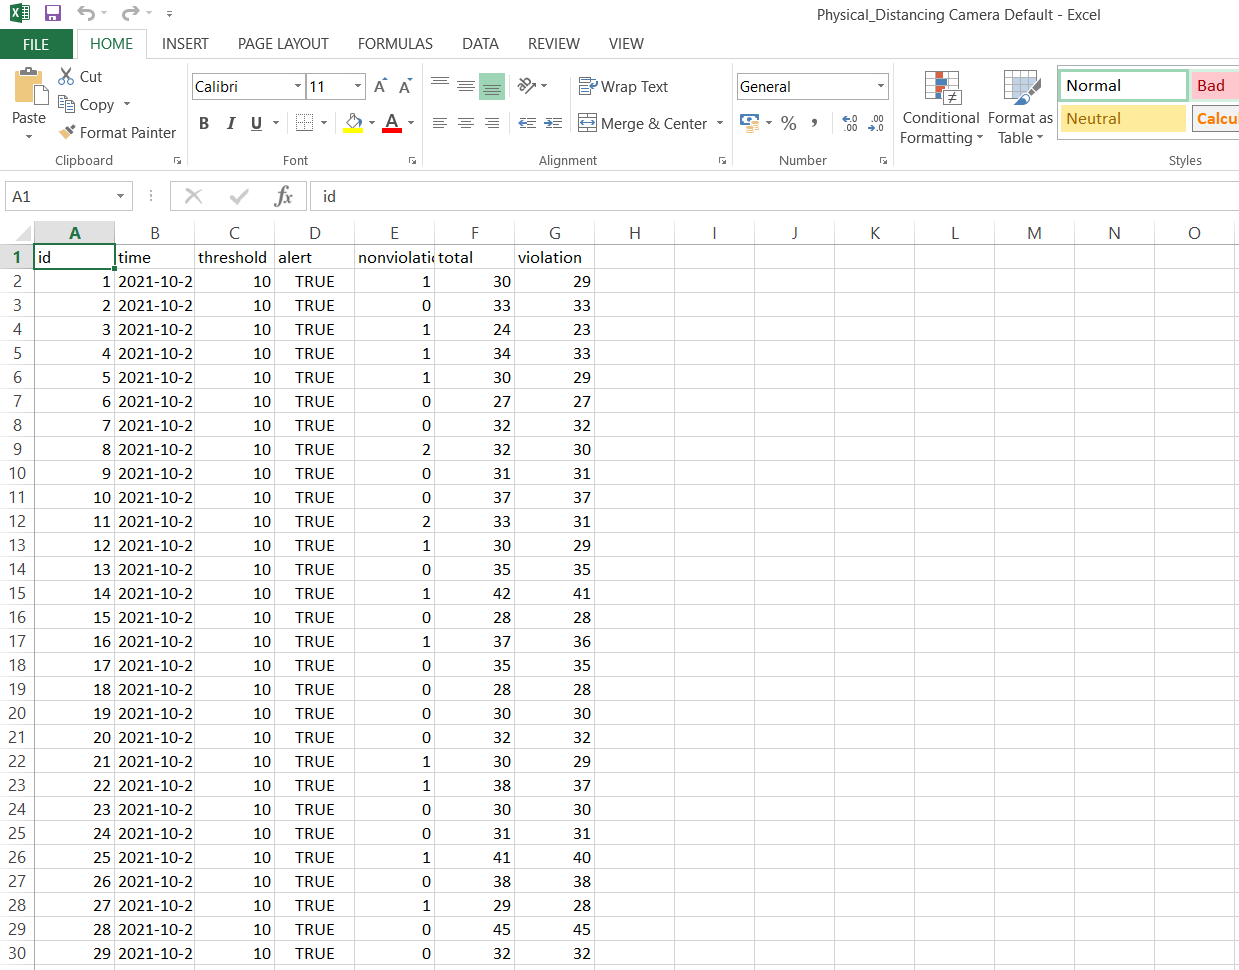
- The exported excel sheet will be downloaded to user’s system which contain details of the event like id, time, threshold, alert, non-violation, total, violation details for Physical Distancing usecase as shown in the above figure.
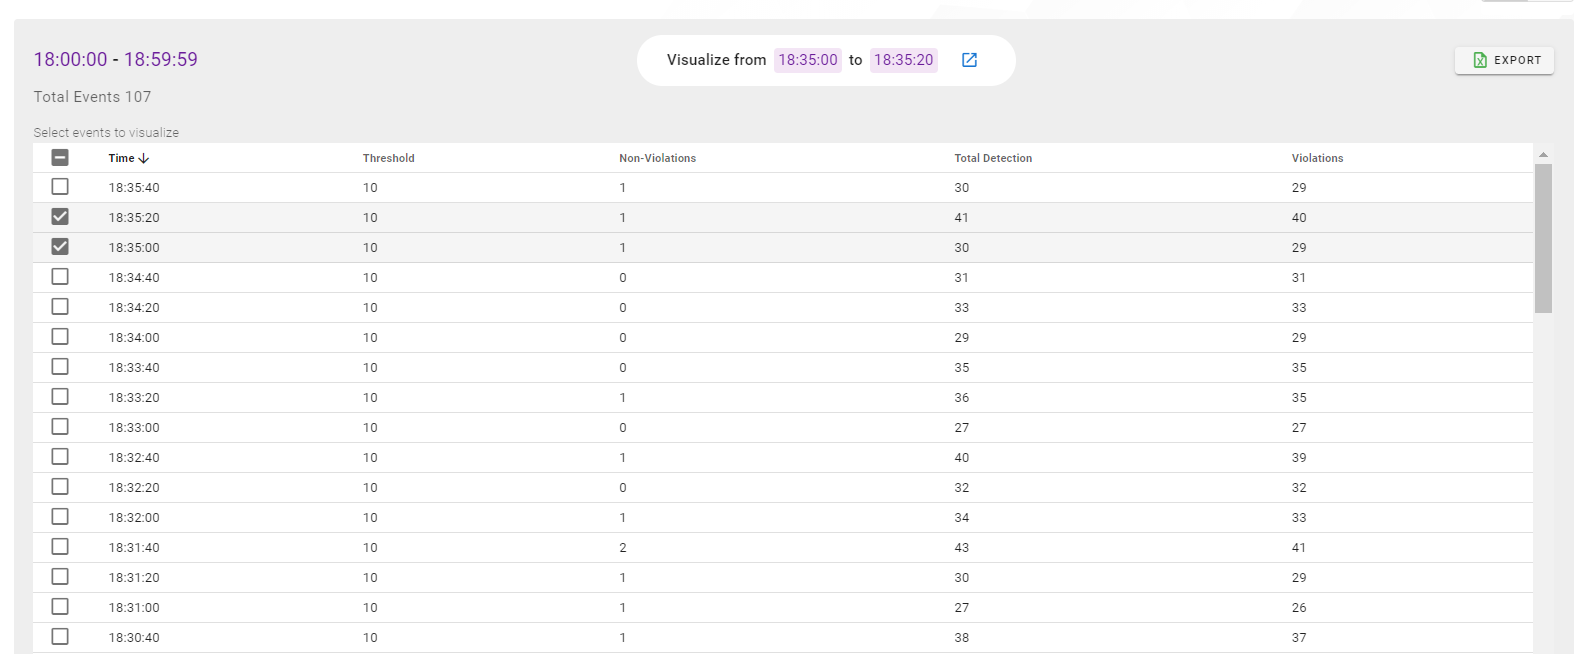
- The Events can be visualized by selecting the check boxes given on the left side of each events.
- The user must select two checkboxes, one is the start event from which user want to start visualizing till another event where the user want to stop visualizing.
- The user can select blue arrow on the visualize tab in the centre to visualize the selected events.
- The user can use the blue slider to slide over the frames of the events and focus the details in the frames as per the requirements.
Notification History
- The user can click on the Notification History button to view all the notifications for the created alarm.
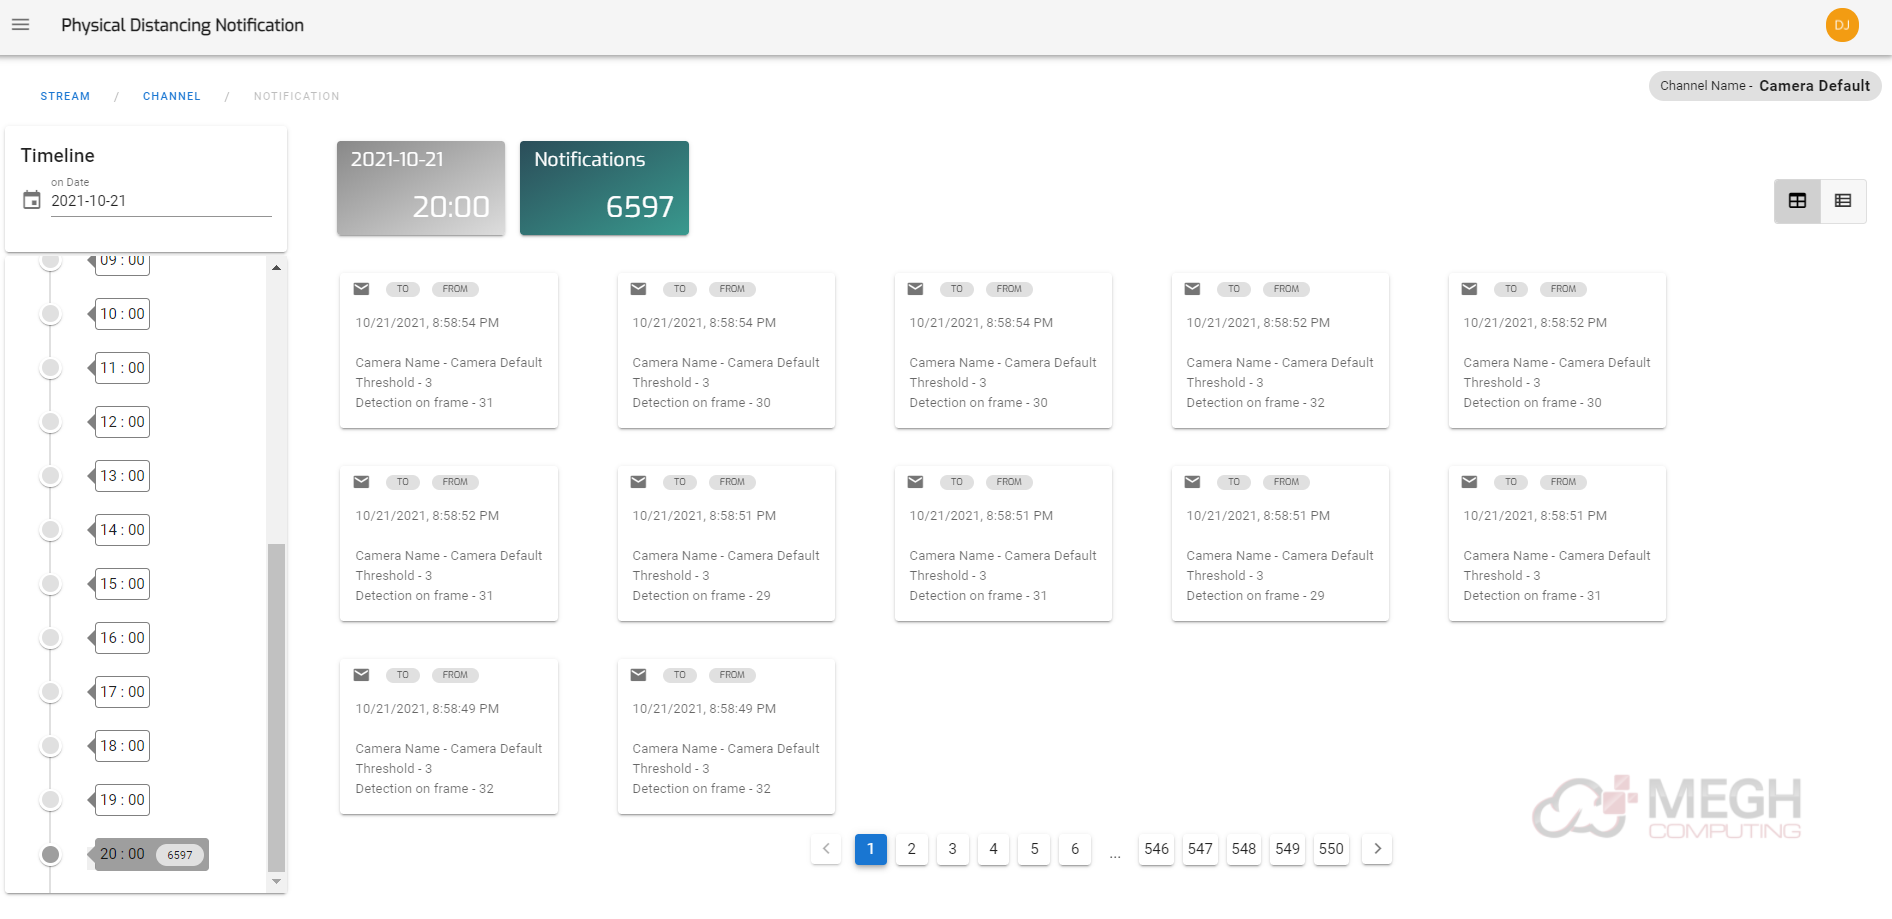
- The notifications on the page can be viewed in two different formats by selecting the icons on top right corner :

- Card view: In this notifications are displayed in the form of cards as shown in the above figure.
- Table view:In this notifications are displayed in the tabular format as shown in the below figure.
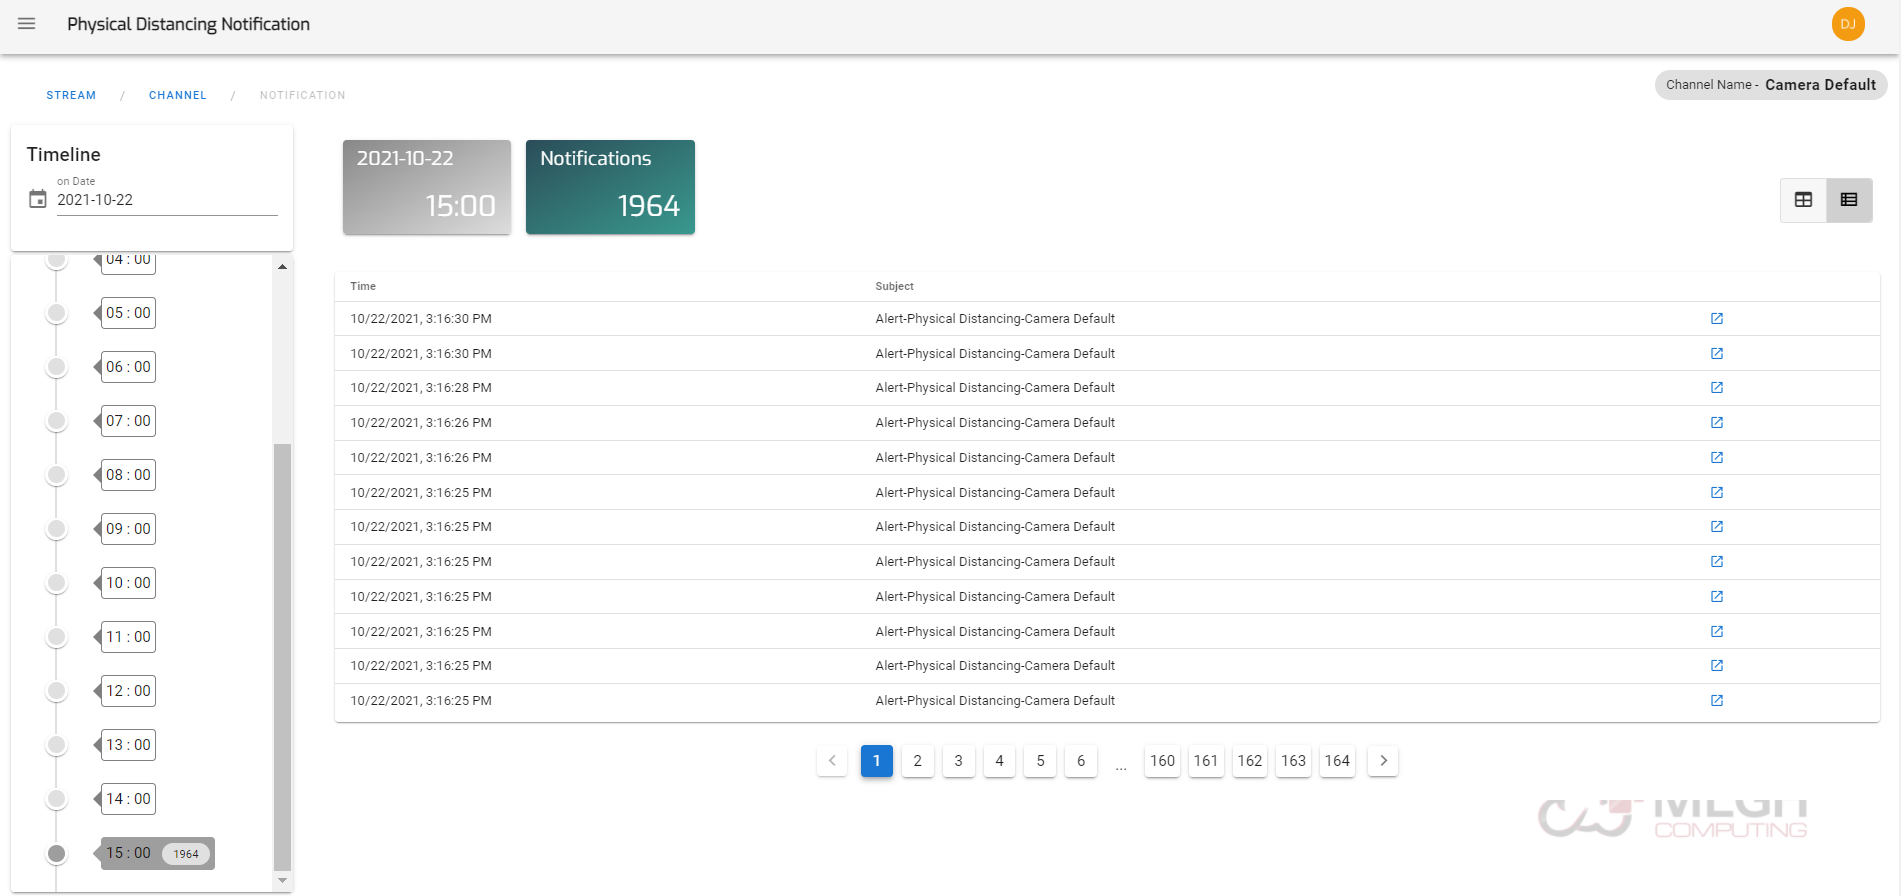
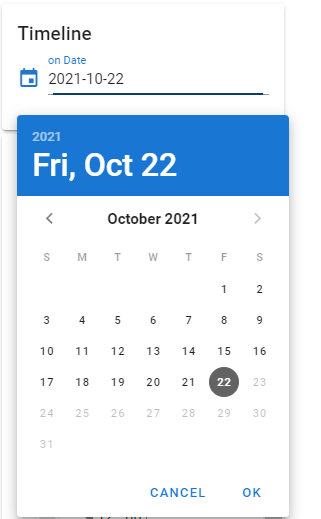
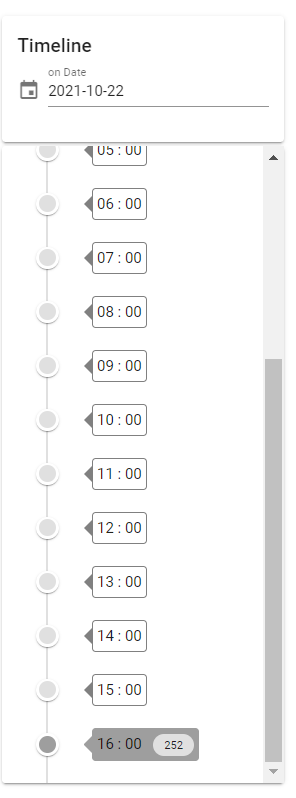
- Timeline bar on the left side of the page consists of two parts i.e Date selector and the time.
- Date selector can be used to select a particular date using the calender so that notifications will be displayed for that specified date.
- Time can be selected from the Timeline bar, the user must select the particular hour of the day for which notifications need to be displayed.
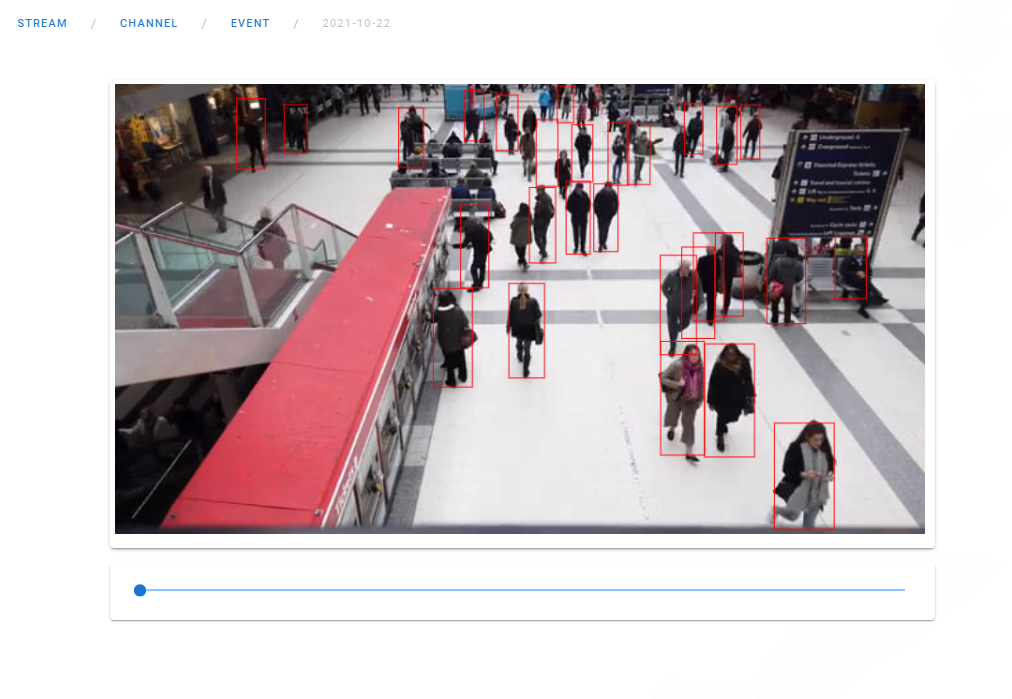
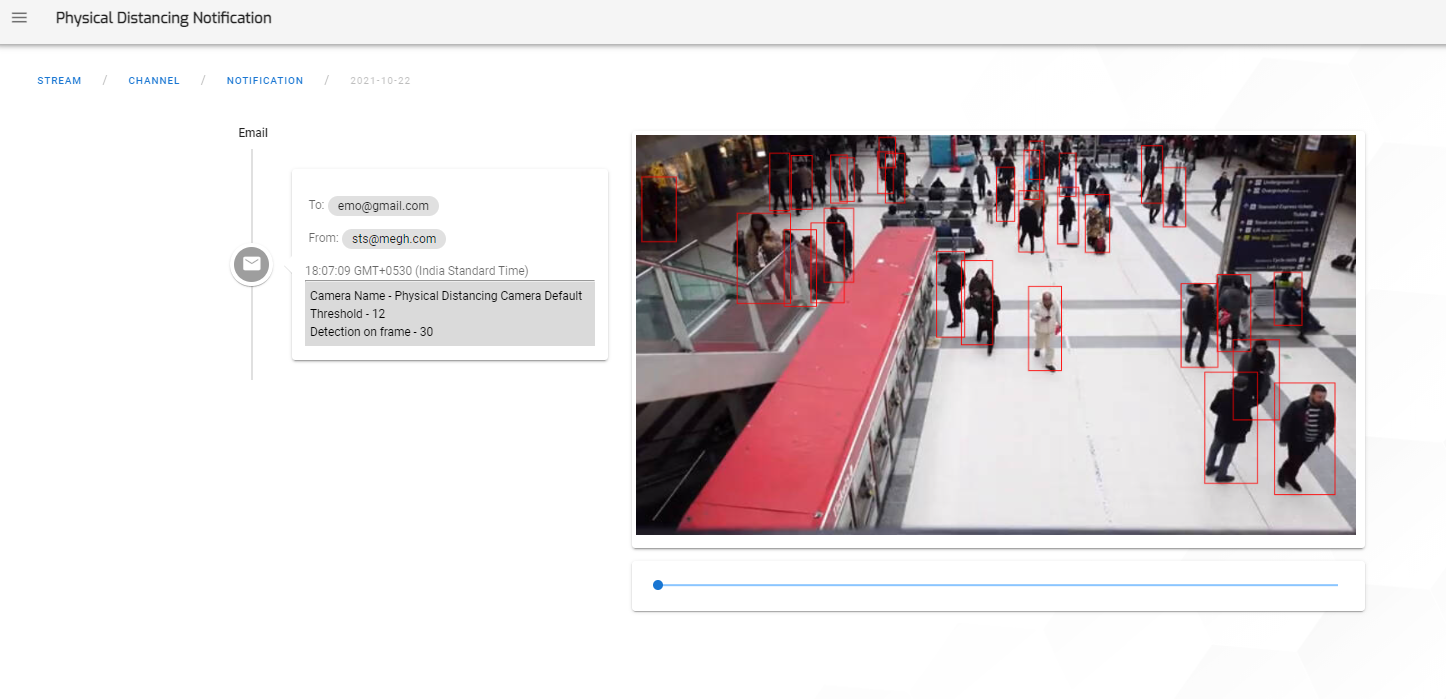
- The user can click on each notification card to view details of that alert and visualize the frames.
- The figure below is Notification Visualization page which contains details of to and from email ids, camera name, Threshold and Detection on frame.
- The user can also view the video frame for which the notification was put up and can use the blue slider to slide over the frame to visualize and focus on the details in the frame as per the requirements.
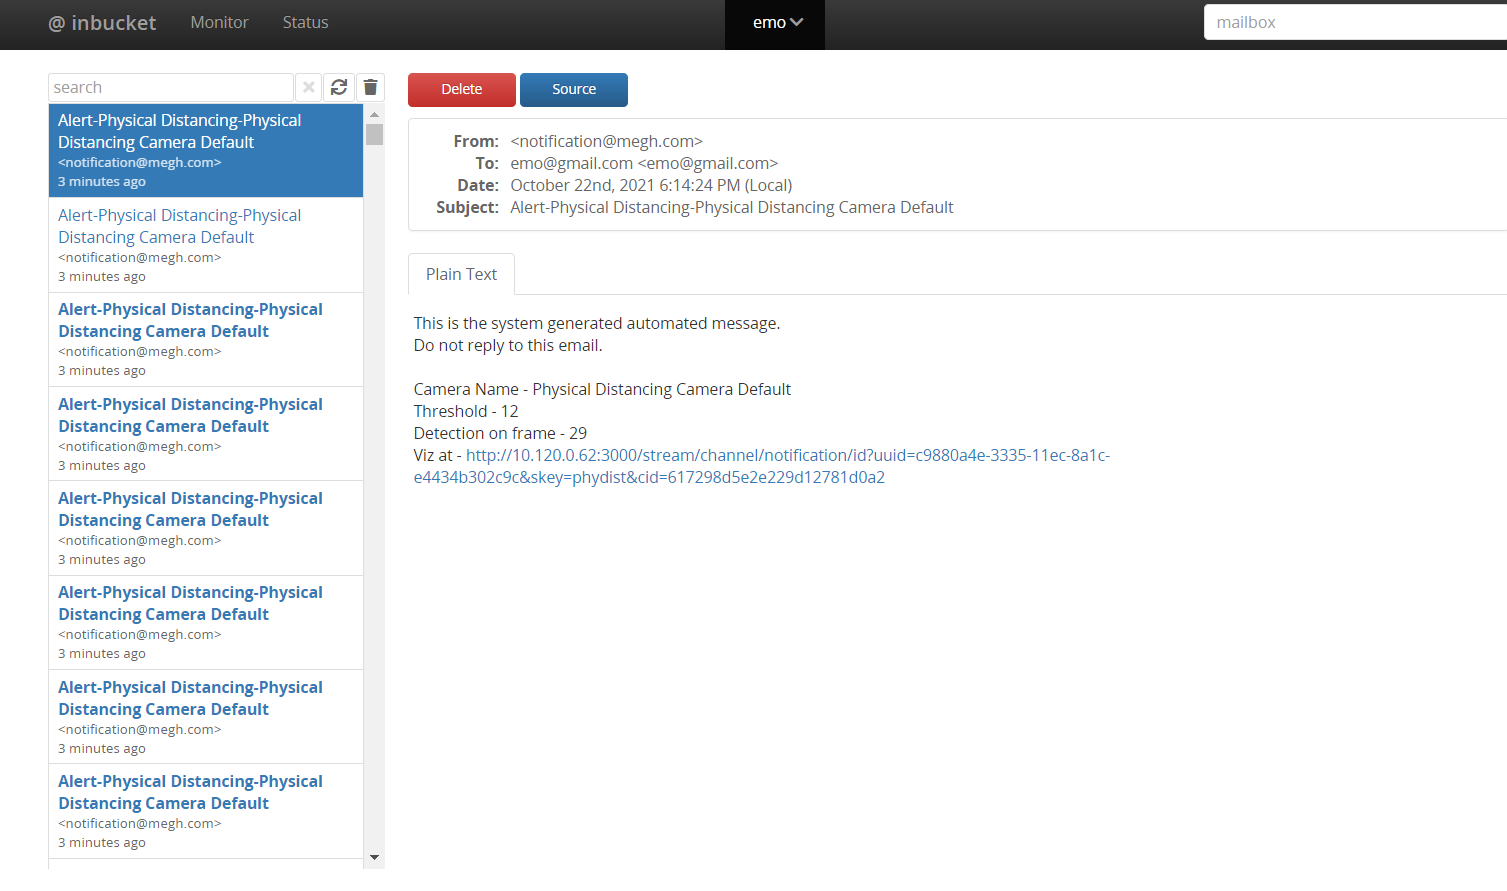
- The alert notifications are sent to the email id of the user, the below figure shows the inbucket website which is used to demonstrate emails which the user receives.
- Inbucket is an email testing service which accepts email from any email address and makes it available to view without a password.
- The emails can be configured so that it can be sent to the personal email account (like gmail, yahoo etc) of the user by making SMTP settings in sts-config.yaml and docker-compose.yaml files.
- Each email sent to the user contains details of the alert like camera name, Threshold and Detection on frame and also the Viz link(Visualization link) which on clicking loops back to the visualization page where the user can visualize the frames for which notification was sent.