Alert Configuration
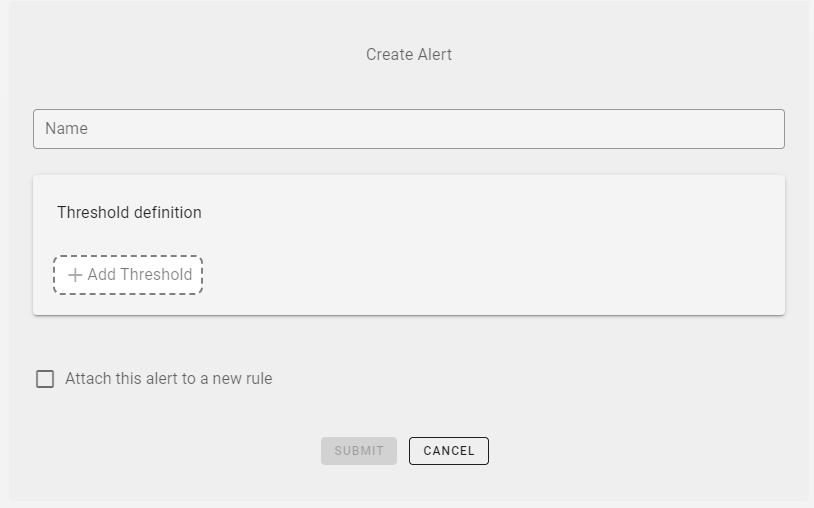
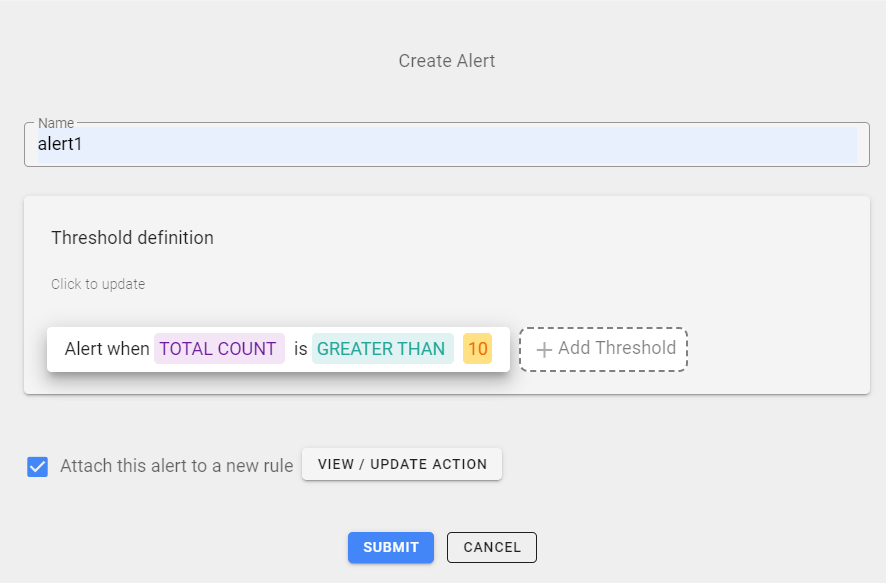
The user can create an alert as per his/her requirement using the Alert Configuration section. User must click on add button to add an alert in alert configuration page. This opens up a form as shown above, here the user must fill following information to add an alert:
Name: Provide a name for the alert. For example, if you are setting an alert for Physical distancing use-case, and you want to have alert based on number of violations then alert name can be
channelname-alerttypeor if the user has single channel then he/she can name it asalert-number.Threshold definition: Here user can click on add Threshold button to set the Threshold key, Threshold Condition and Threshold as shown in the below image.
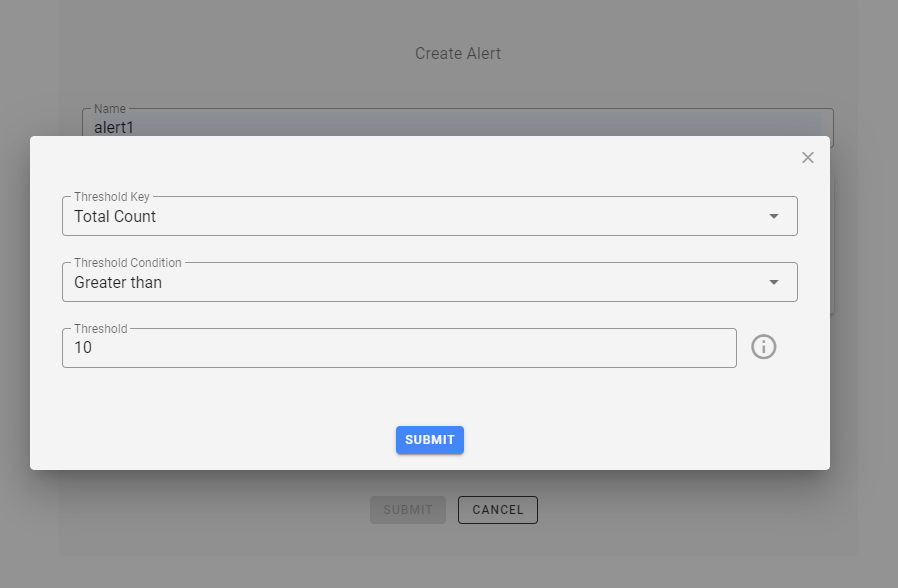
Threshold Key:In this field user must specify the key for which the alert is to be created, for this the user is provided with options in dropdown list. For example-Total detection, Violation, Non-violation are provided for Physical distancing use case, these options can differ according to the use cases for which alert is being configured.Threshold Condition:The user can set an alert for different threshold conditions namely:- Equal : To generate an alert when Threshold value is equal to the specified number given by the user
- In-Range: To generate an alert when Threshold value is in between the specified numbers given by the user i.e. for this the user must provide minimum and maximum threshold values and alerts are generated for values inside this range and also for minimum and maximum threshold values specified.
- Out-Range: To generate an alert when Threshold value is outside the range of specified numbers given by the user i.e. for this the user must provide minimum and maximum threshold values and alerts are generated for values outside this range.
- Greater-than : To generate an alert when Threshold value is greater than the specified number given by the user.
- Greater-than-Equal : To generate an alert when Threshold value is greater than or equal to the specified number given by the user.
- Less-than : To generate an alert when Threshold value is lesser than the specified number given by the user.
- Less-than-Equal : To generate an alert when Threshold value is lesser than or equal to the specified number given by the user.
- NotEqual : To generate an alert when Threshold value is not equal to the specified number given by the user.
Threshold:In this field the user must enter the Threshold value according to the Threshold condition selected.Attach this alert to a new rule: User can check this option if they want to attach the above created alert to a new rule. This option is not mandatory, user can just skip this option and go ahead and click on submit to create just an alert and if required user can later add created alerts to form rule in contextual rule section. If they wish to create rule from the new alert itself, user can check this box, and it opens up a dialog box as shown in below image.
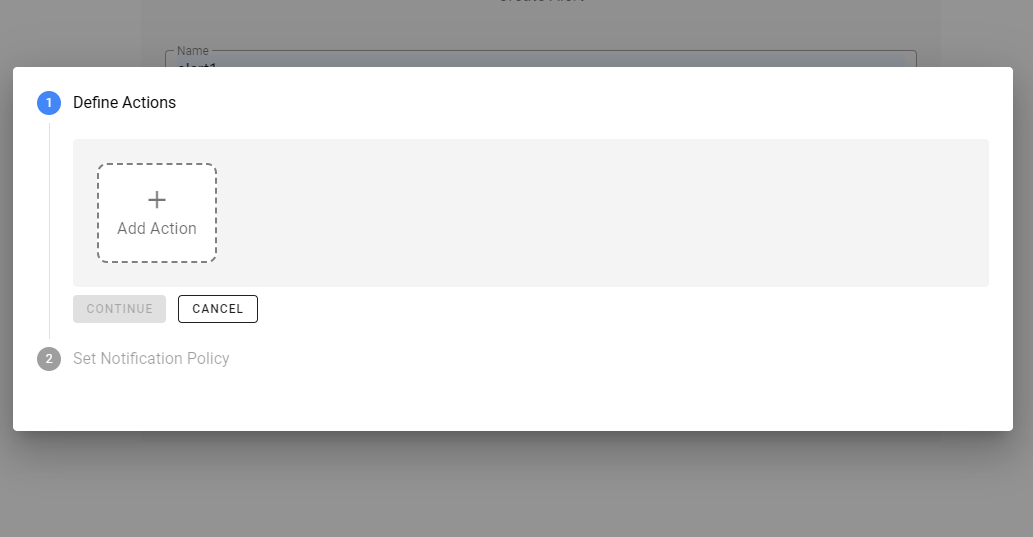 The above image shows two steps to attach a new rule to the alert being created. First step is to add action here user should click on add actions buttons which opens up 3 actions i.e. e-mail, sms, webhook.
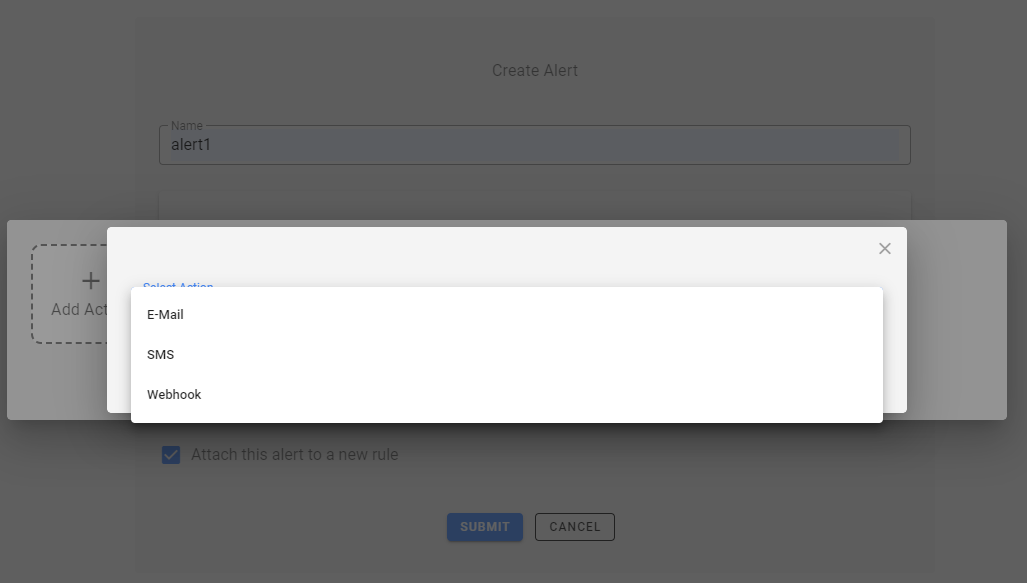
Actions: Based on user's selection of action type i.e. E-Mail, SMS, Webhook, user is sent notification alert through that. Selecting anyone of the 3 is mandatory for the user.
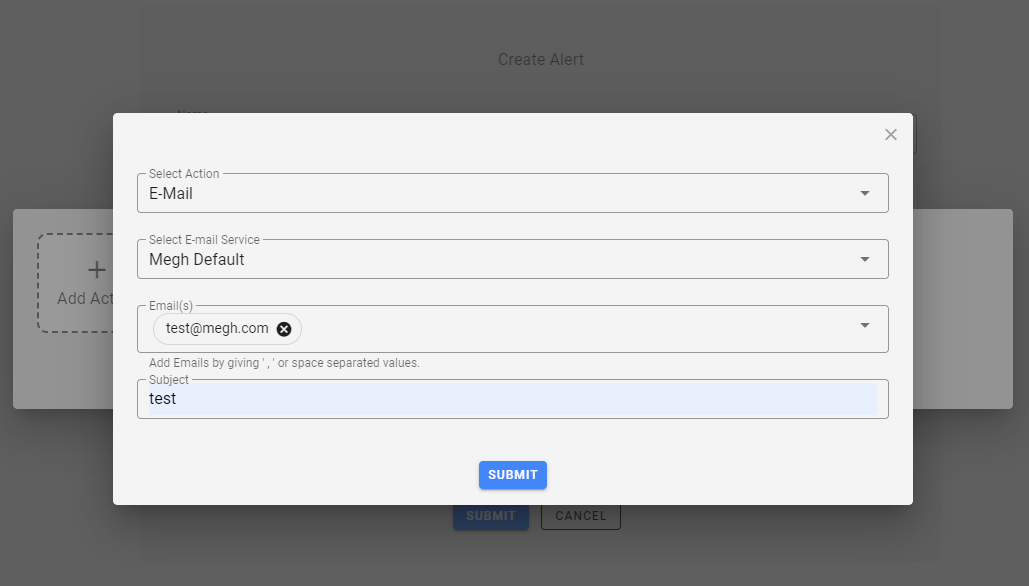
E-Mail: Here the user must enter the email id to which notification mail needs to be sent. Users can give multiple email ids by using ‘,’ or space separated values. In the next field user can give the subject for the mail and click on submit.
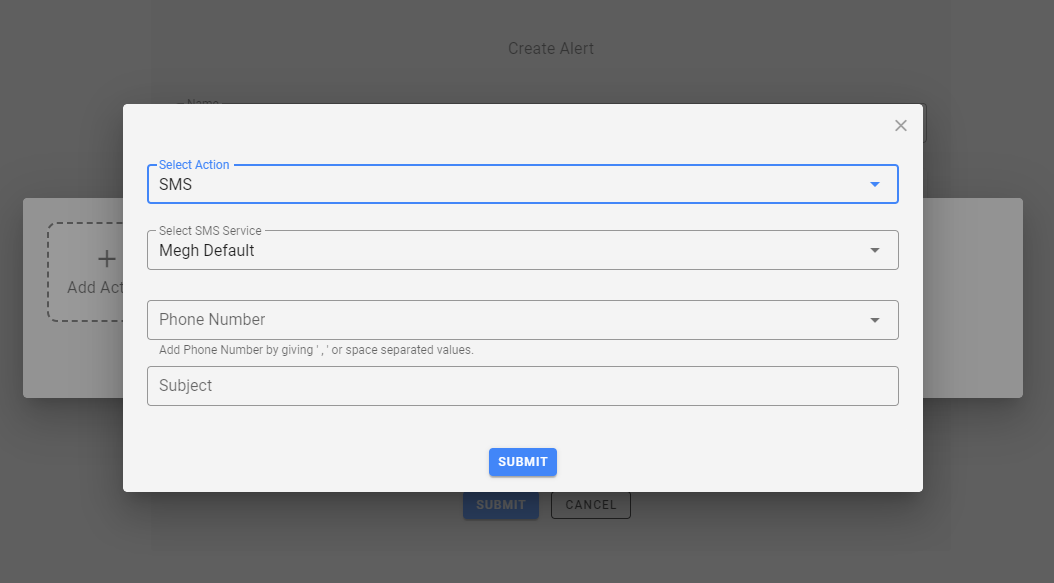
SMS: Here the user must enter the Phone number to which notification sms needs to be sent. Users can give multiple phone numbers by using ‘,’ or space separated values. In the next field user can give the subject for the mail and click on submit
Webhook: A webhook is essentially an automatic message being sent from one piece of software to another which is achieved using APIs. Here the user should specify the
URL(Eg: www.megh.com) of his/her choice. Next user must select the method i.e.GETorPOSTmethod from the drop-down. In the next field user must select the type of Payload eitherAutowhich has default payload orCustom JSONto customize the payload of his/her choice.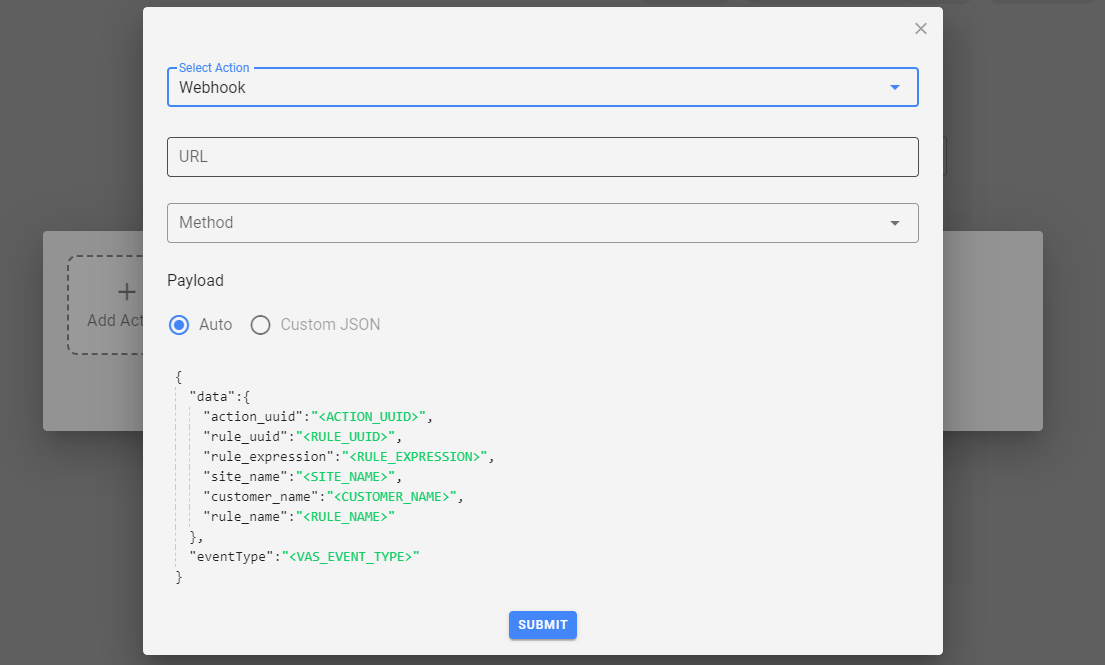
Next step is to set notification policy for the created rule.
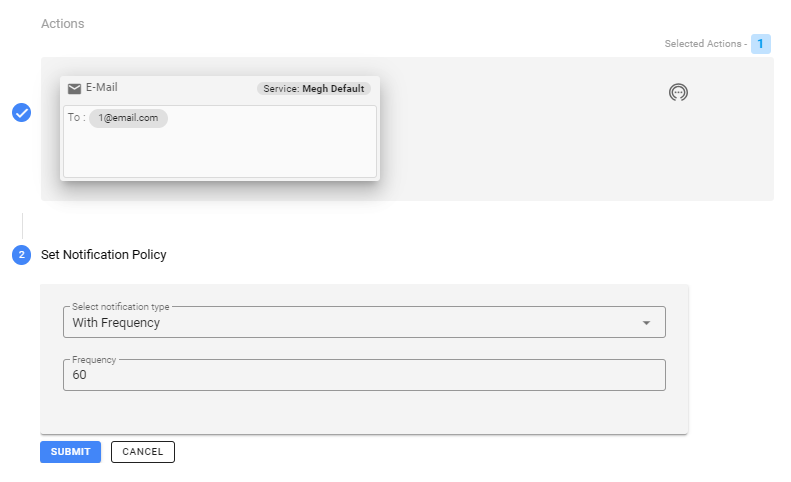
Here user has to select the frequency with which the rule notifications must be sent as shown in the above image. By default its 60 seconds i.e rule notifications will be sent for every 60 seconds, user can update the frequency as per their requirement.
Once the user is done with above step, user is brought back to the filled alert form. User can review and if required can update the threshold definition or Update action in attach alert to rule section and click on submit to create an alert.
Once the alert is created, the user can view all the options i.e., activate/deactivate, Edit and delete buttons on the alert card as shown in the below image.

User can click on activate/deactivate button for activation/deactivation of the created alert.
User is given the provision to create multiple alerts and activate/deactivate them simultaneously.
User can make changes to added alert by edit option which takes user to update alert form.
Here user can edit the threshold definition by clicking on the threshold card in the threshold definition section and edit the threshold definition details and update and submit the form.
User can also delete the alert permanently by using the delete option if the alert is no longer required.